How can measurements with inclinometer probes be post-processed?
Sometimes it is necessary to post-process measurement data for various reasons before further evaluation.
Possible reasons:
The probe was not inserted correctly into the borehole and the A/B axes are reversed in the measurement.
It is possible that certain depths have been measured twice or that steps have been omitted
It may happen that the measurement could not be carried out to the end due to a physical blockage of the borehole.
It is possible to export individual measurements in CSV format, customise them and upload them again. Please note that for a successful re-import, the GUID of the measurement must be changed or the original measurement must be deleted before the import.
Step 1: Select measurement
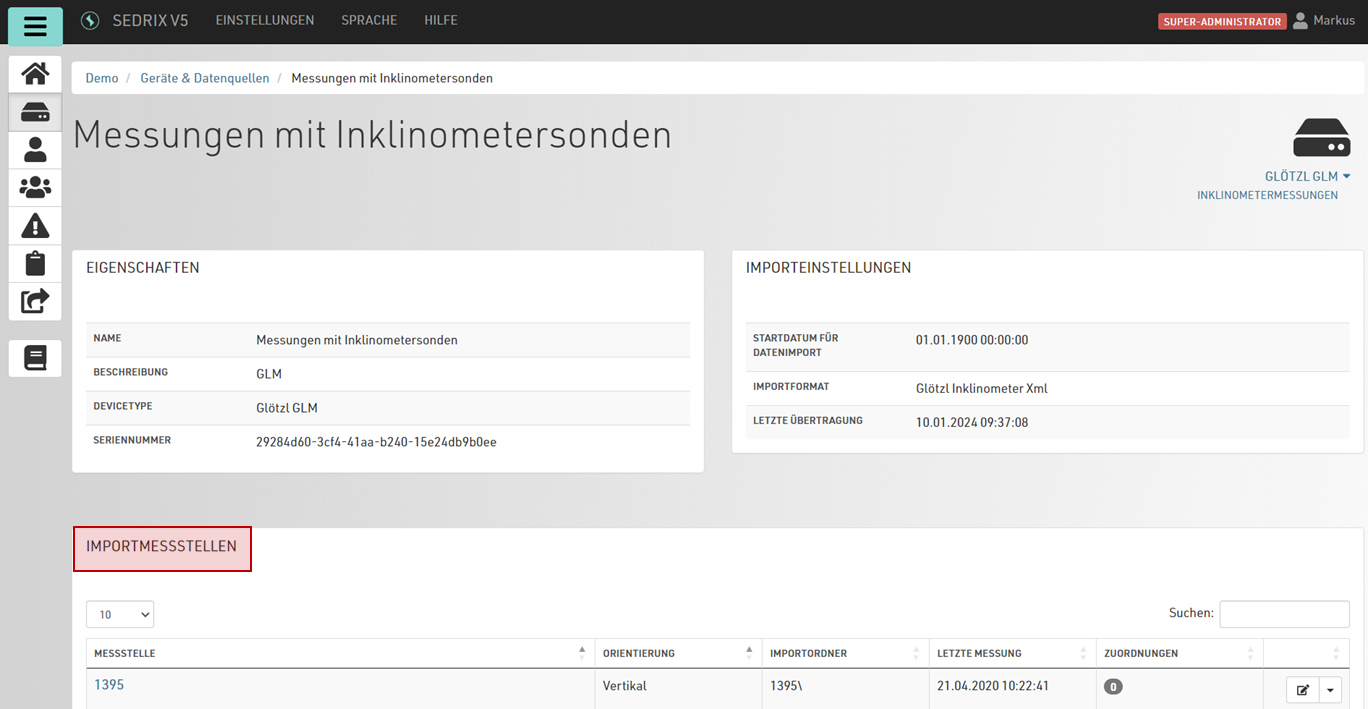
To do this, open the details of the data source and select the corresponding import measuring point for which you want to post-process a measurement:
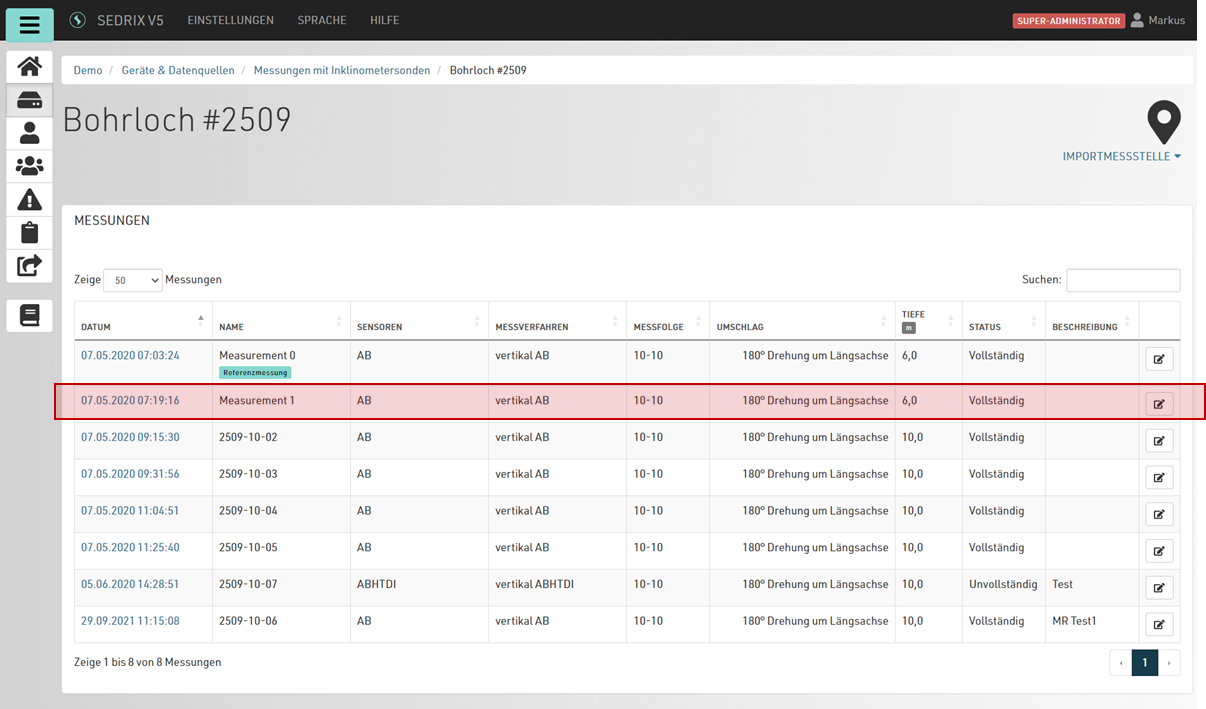
Now select the measurement to be post-processed from the list of measurements. In the example, "Measurement 1":
Step 2: Export measurement in CSV format
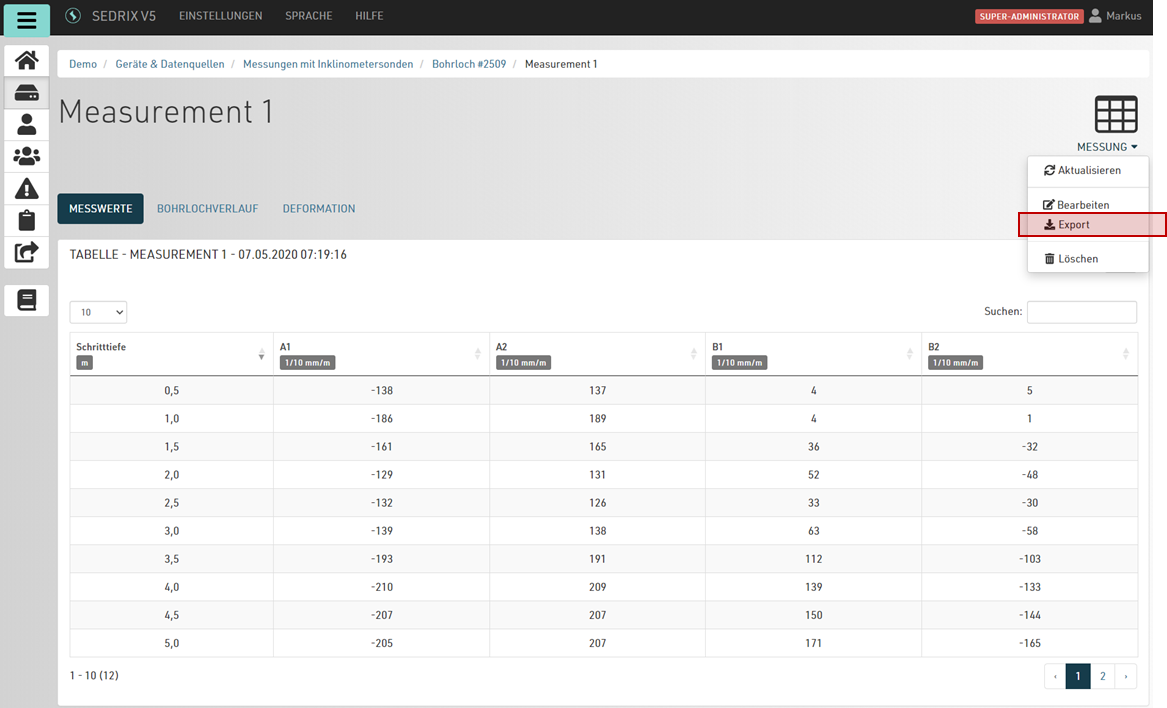
The measured values of the measurement are displayed. It is possible to export the measurement in CSV format via the context menu on the right.
Step 3: Edit CSV file
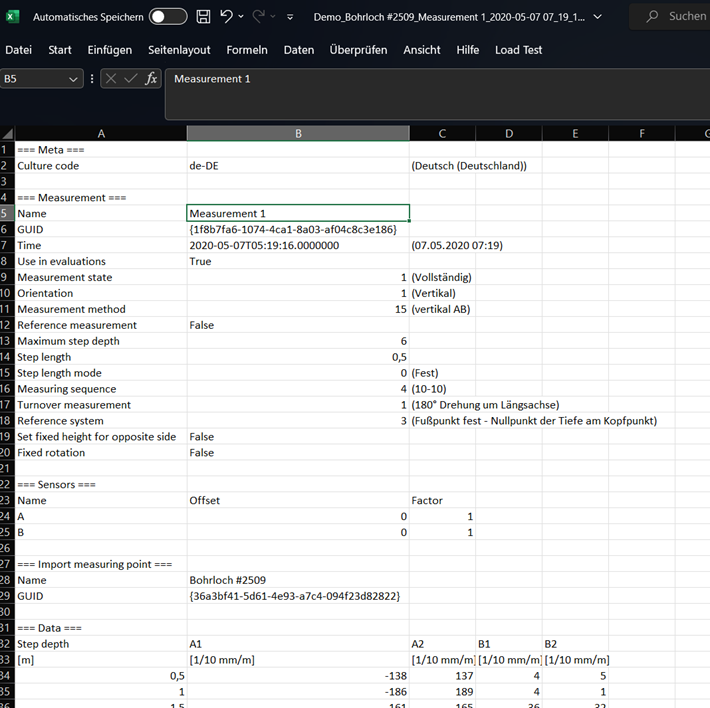
You can edit this with Microsoft Excel, for example, or with a text editor. If you open the file, you will recognise five areas:
Meta
Measurement
Sensors
Import measuring point
Data
The first column must not be changed.
The values in the second column can be edited.
The values in the third column are purely informative for all areas except Data.
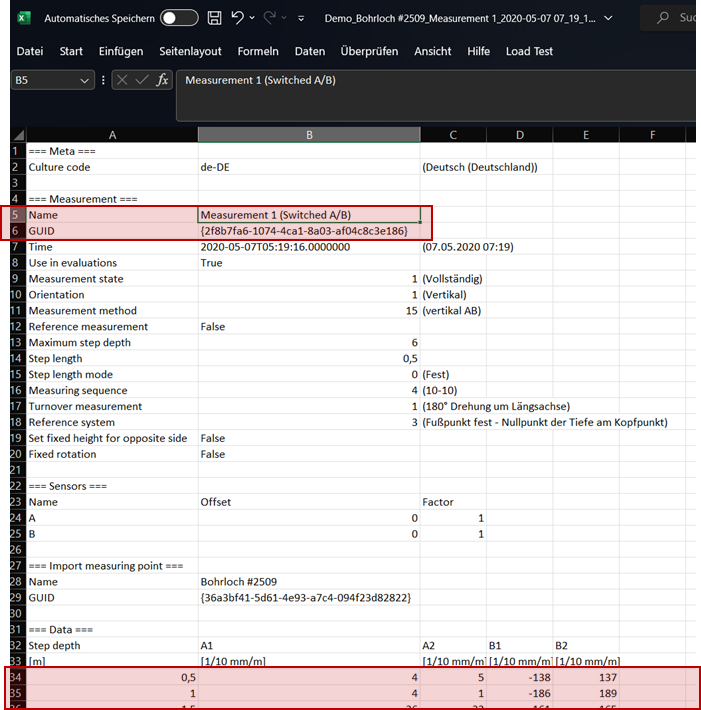
You can now customise the measurement data as required. However, it is necessary to change the GUID so that it is imported and this measurement is not recognised as a duplicate. Changing the name is not mandatory, but recommended.
In the example, A and B values have been swapped:
Step 4: Upload modified CSV file
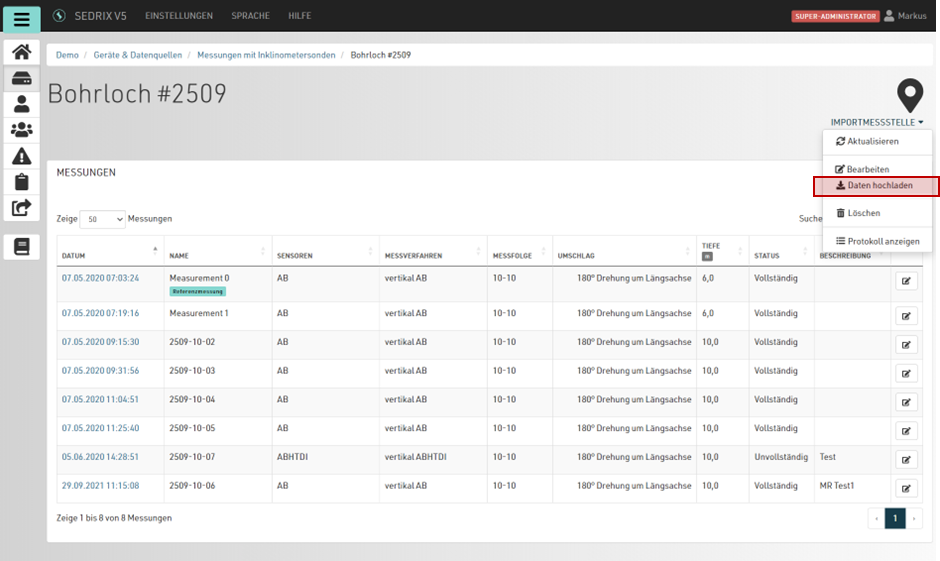
After saving, the file can now be uploaded again. To do this, go back to the list of measurements and click on "Upload files" in the context menu on the right.
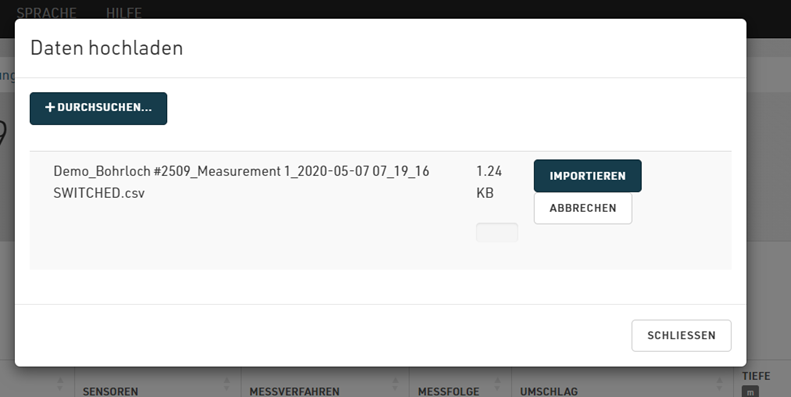
A dialogue opens with which the edited CSV file can be uploaded.
After uploading, it may take a moment for the import process to complete. It may be necessary to reload the page.
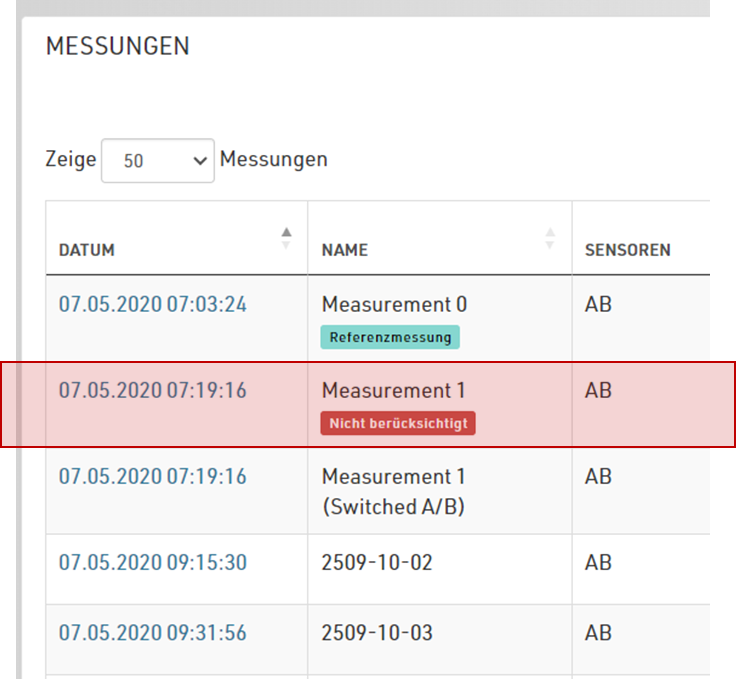
The edited measurement should now appear in the list:
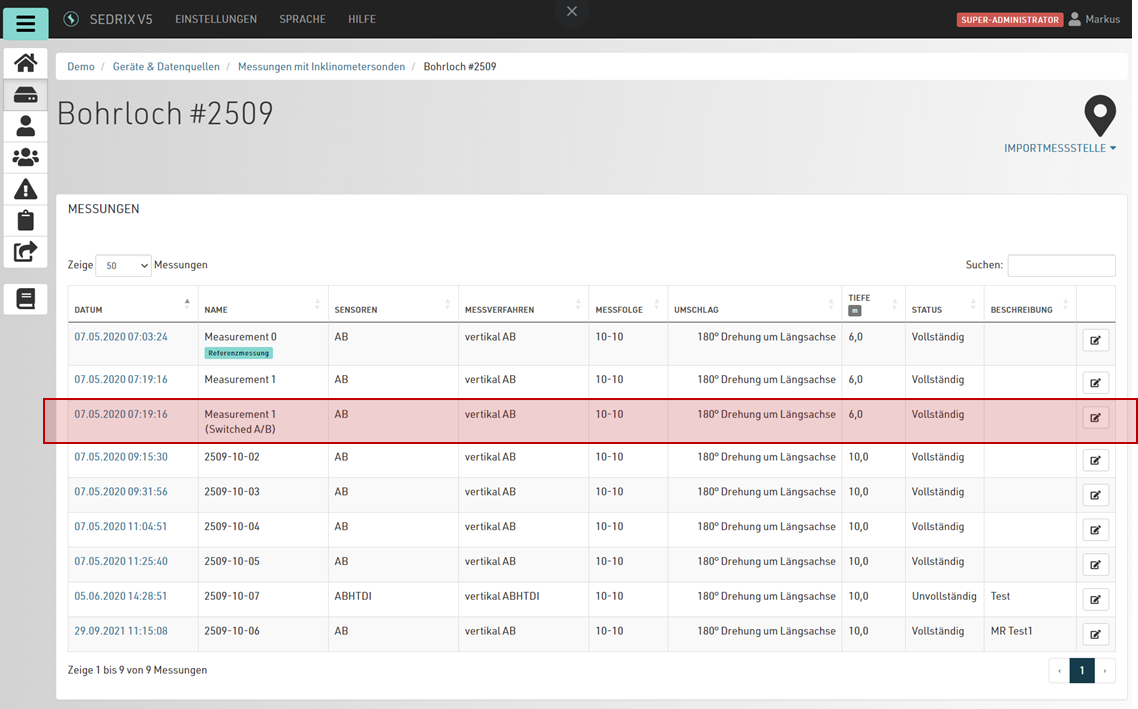
Step 5: Delete or hide original measurement
The original measurement can now be deleted. Alternatively, if you want to keep the raw data, you can mark it in the measurement settings so that it is not included in the analyses. To do this, go to the properties of the measurement.
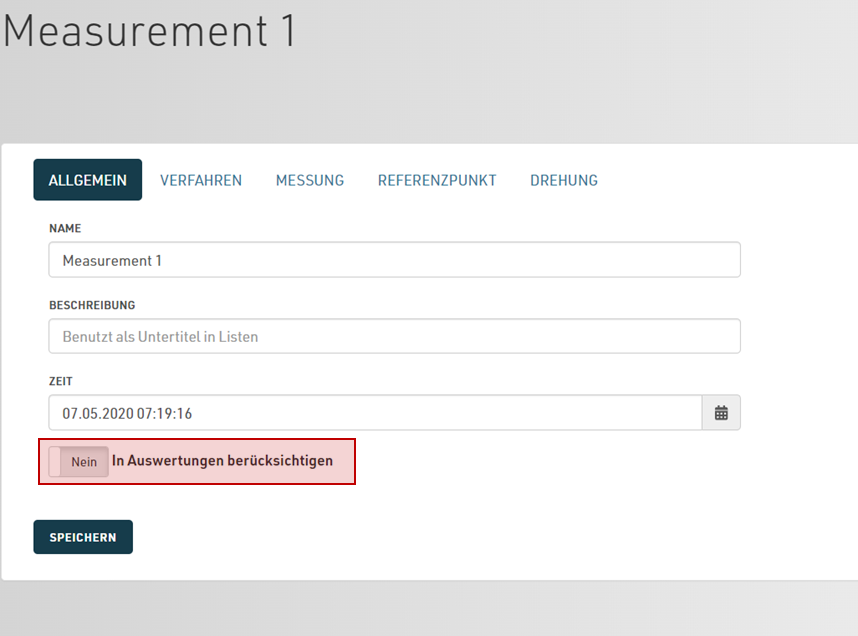
After saving, this property is also displayed in the list: