Evaluation Views
Introduction
The function of the evaluation views is available for logger, tachymeter and global evaluation measuring points.
The evaluation views are an intermediate level between the individual measuring point and its evaluation. Before the evaluation views were introduced, only a single evaluation could be defined for a measuring point. Several evaluation views can now be stored at each measuring point. Each of them can be freely configured and corresponds in functionality to an earlier "evaluation".
The advantage of this is that you can always select the view that is most suitable for the current situation from the created views. For example, one report can be created with one evaluation view, while another report (for which different content is required) can be created with another evaluation view. Instead of having to manually adapt evaluations for different requirements, a separate view can be created for each situation; switching between them is smooth. Once created, views can be duplicated so that they can serve as the basis for new views and the effort required is reduced to a minimum.
Create and Manage Evaluation Views
Open the context menu on the right of the desired measuring point by clicking on the measuring point icon 

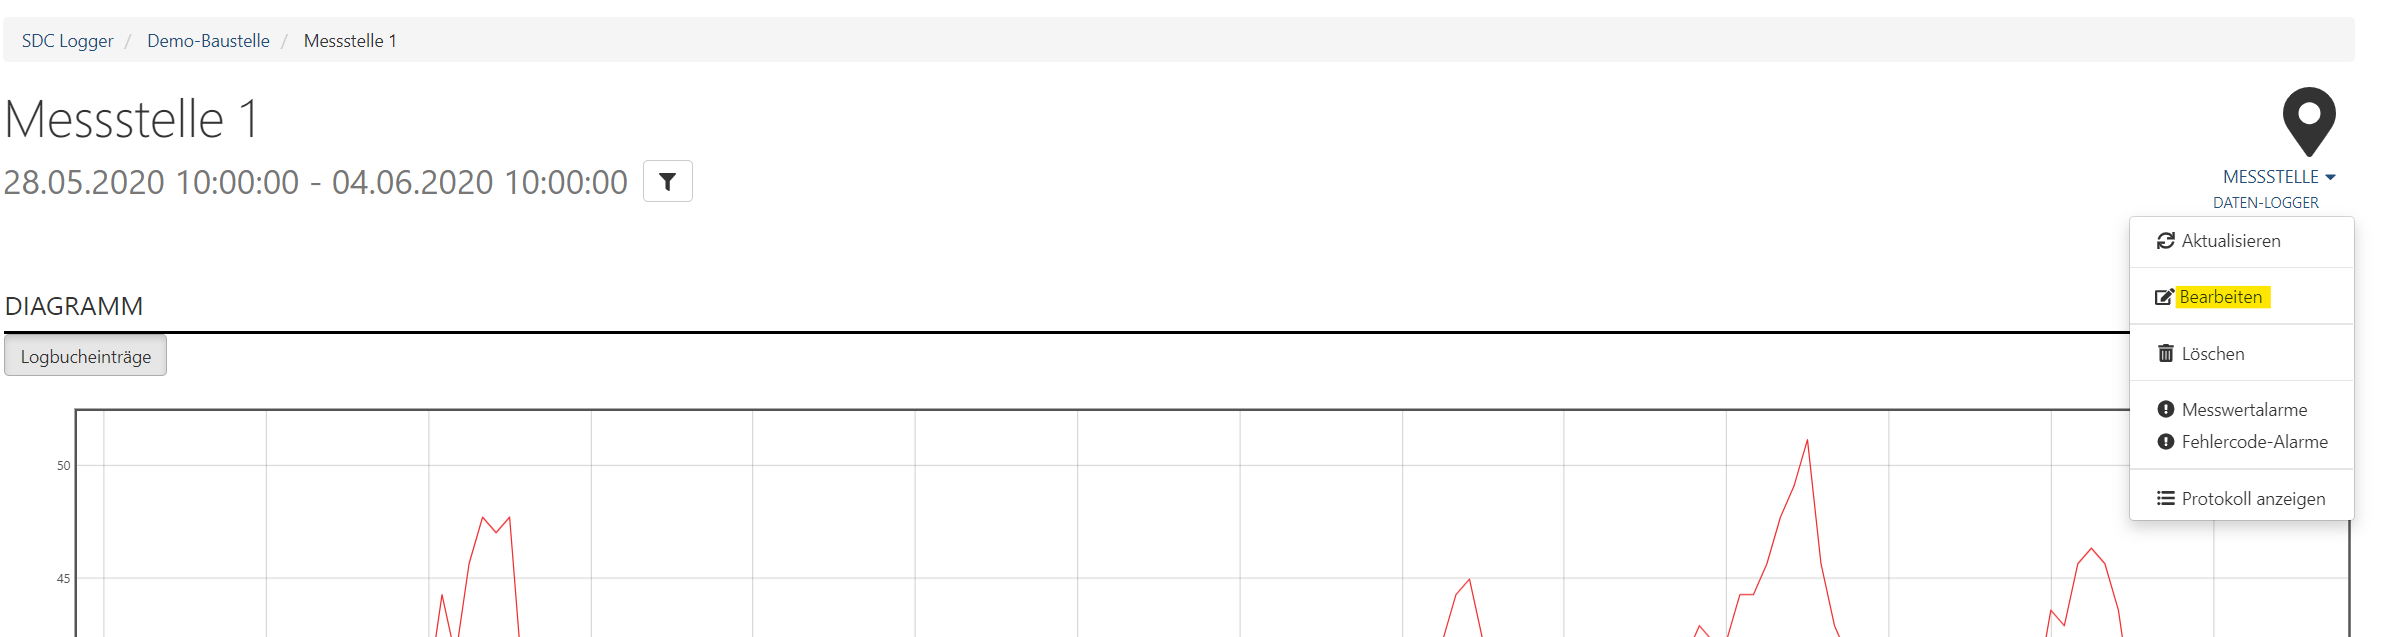
Now select the tab "Evaluation views" in the Edit mode.

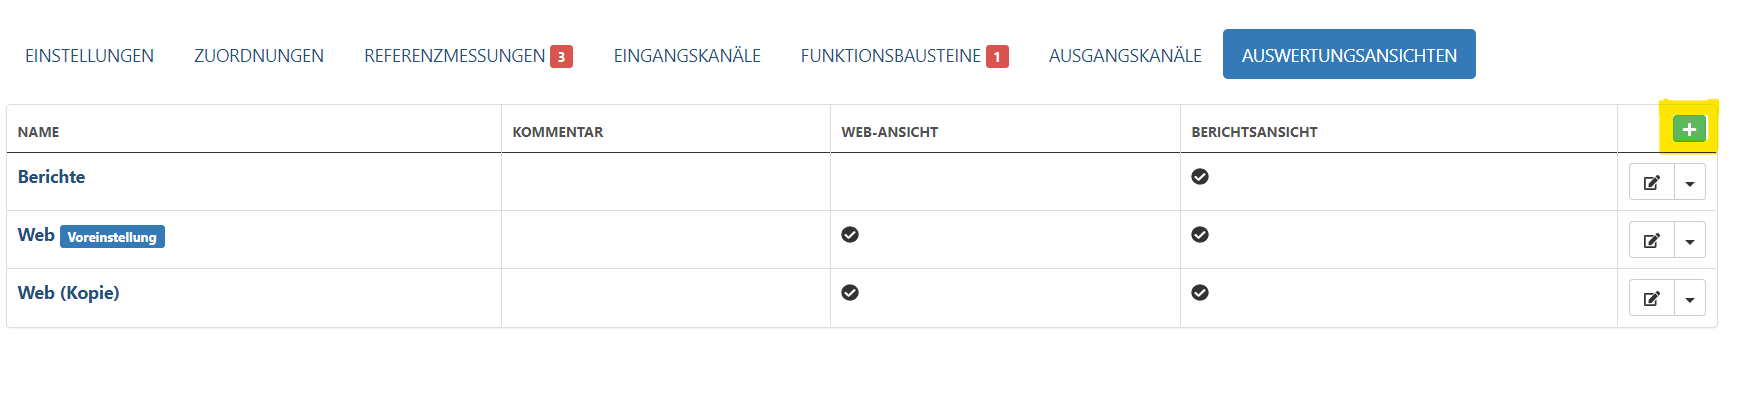
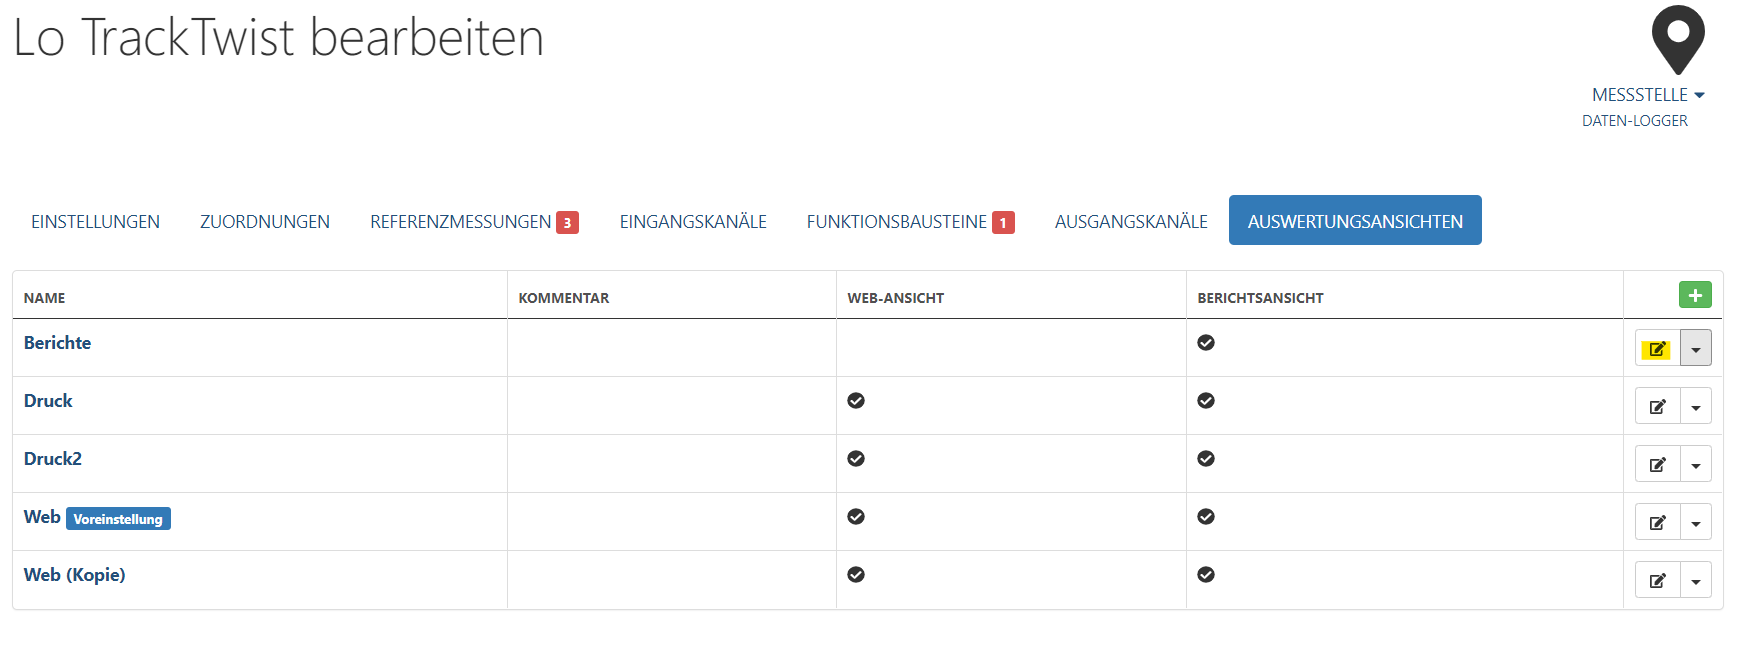
All existing evaluation views can be found here. The two columns "Web" and "Report" show in which areas an evaluation view can be used. If there is a check mark in a "Web" column, the evaluation view can be selected in the web view of the measuring point. If the check mark is in the "Report" column, this evaluation view can be used to generate reports. A new evaluation view can be created by clicking on the button with the plus icon (
Create a New Evaluation View
A new evaluation view can be created by clicking on the button with the plus icon (
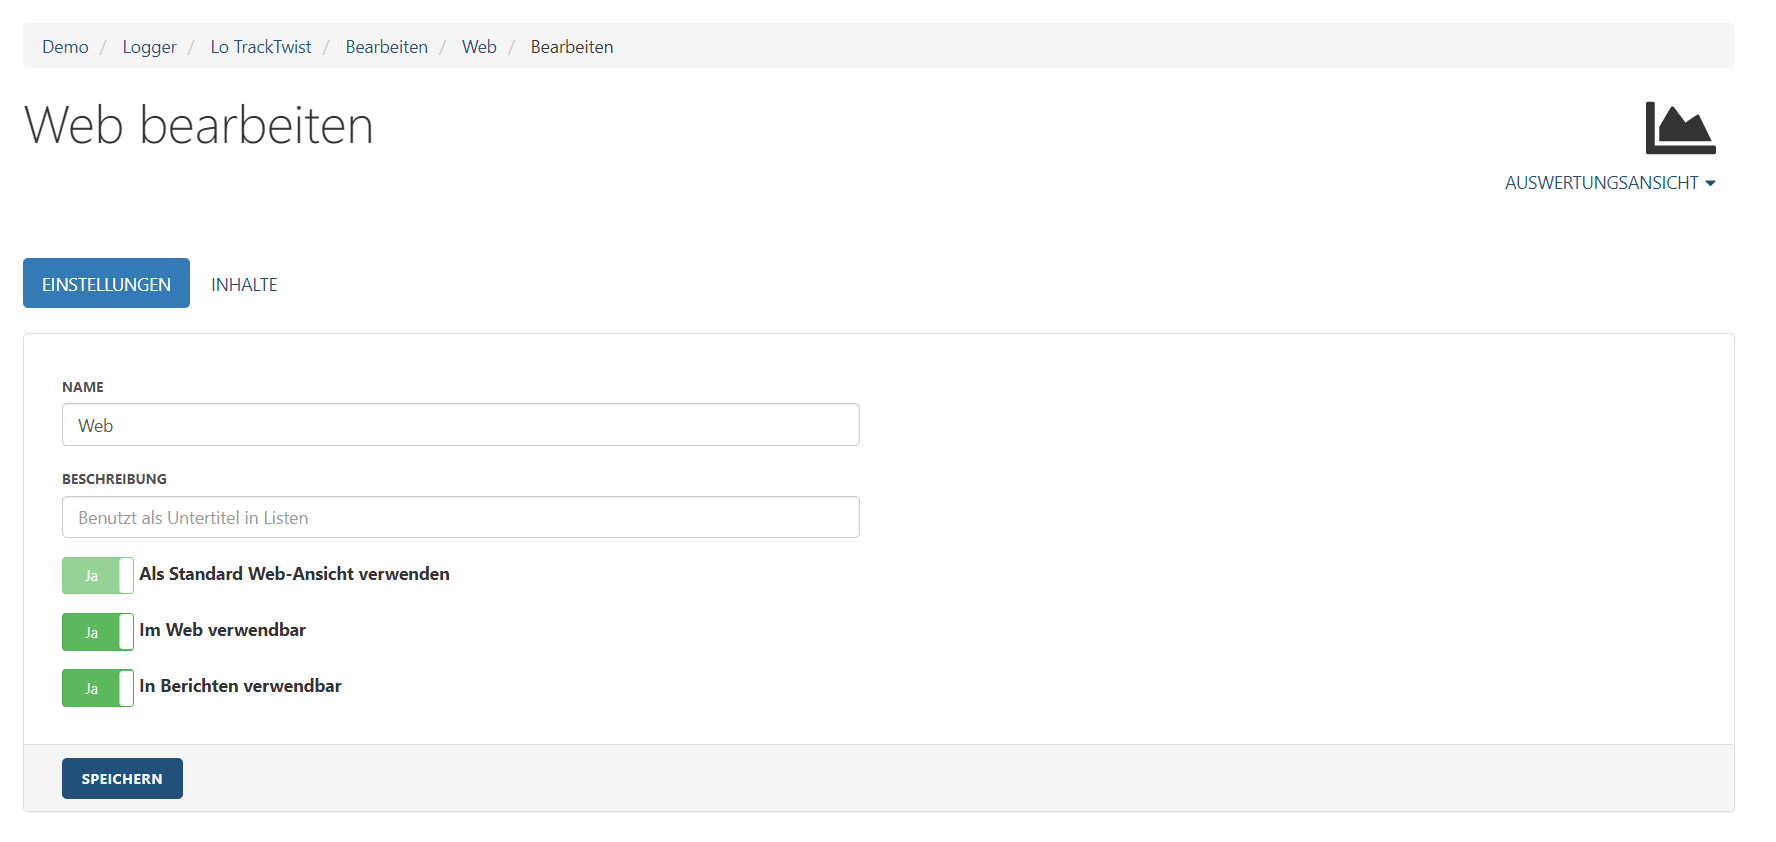
Name: Text field to enter the name of the evaluation view. The name must be unique within the project.
Description: This is an optional text field; the text, if available, is displayed in lists as a subtitle. The field can be used to describe the purpose of the evaluation view even better.
Use as standard web view: If the page of a measuring point is called up, the web view specified as standard is used for this. When the switch is activated, the current view becomes the standard view (there can only be one standard view per measuring point).
Usable on the web: If this field is activated, you can switch to the created view when the page of the associated measuring point is called up in the browser.
Usable in reports: If this field is activated, the created view can be used when generating a report.
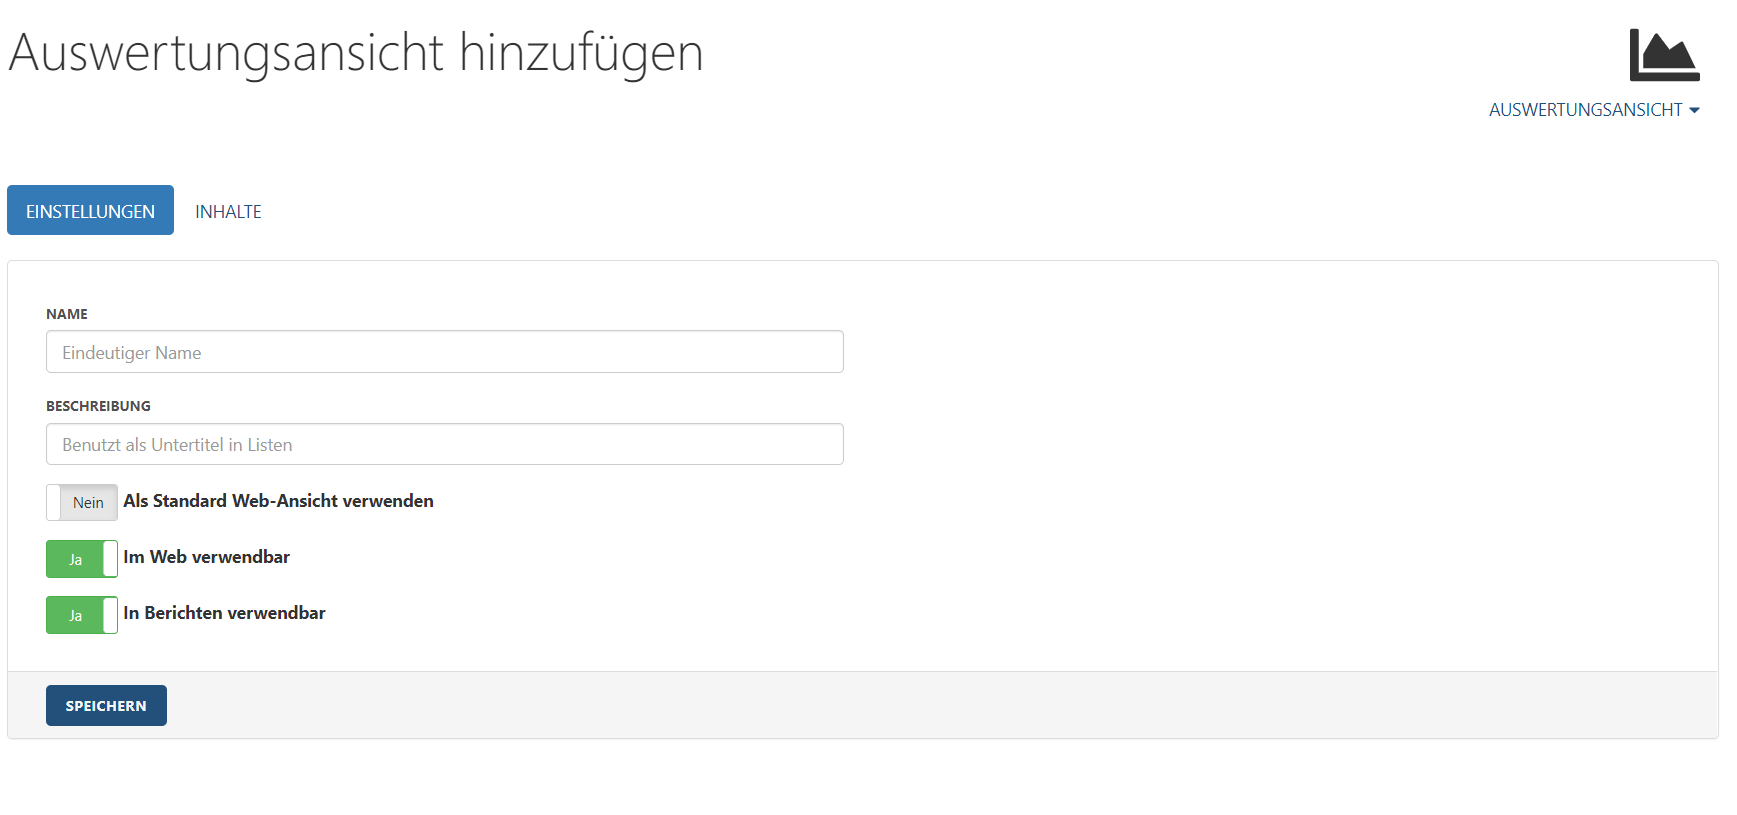
The content of the evaluation view can now be defined in the "Contents" tab. In order to make changes here, a name for the view must first be entered under "Settings" and confirmed with "Save". Only then is editing possible.
By clicking on the "Add" button, a new element can be added to the view.

Clicking on the "Add" button opens a pop-up menu. The desired element can now be selected from the list and added to the view. With the help of these blocks, the evaluation view can now be set up according to your own needs.

If a block has been added to the view, it appears and can be configured.
Heading: Text can be entered in this field. This then appears as a heading above the corresponding element in the web view or in the report.
Visibility: This point can be used to determine whether the corresponding module is visible to all users of Sedrix or only to administrators.
The other fields differ depending on the block type. For a diagram you can set the value axis and aspect ratio, for a table the number
of the columns etc.
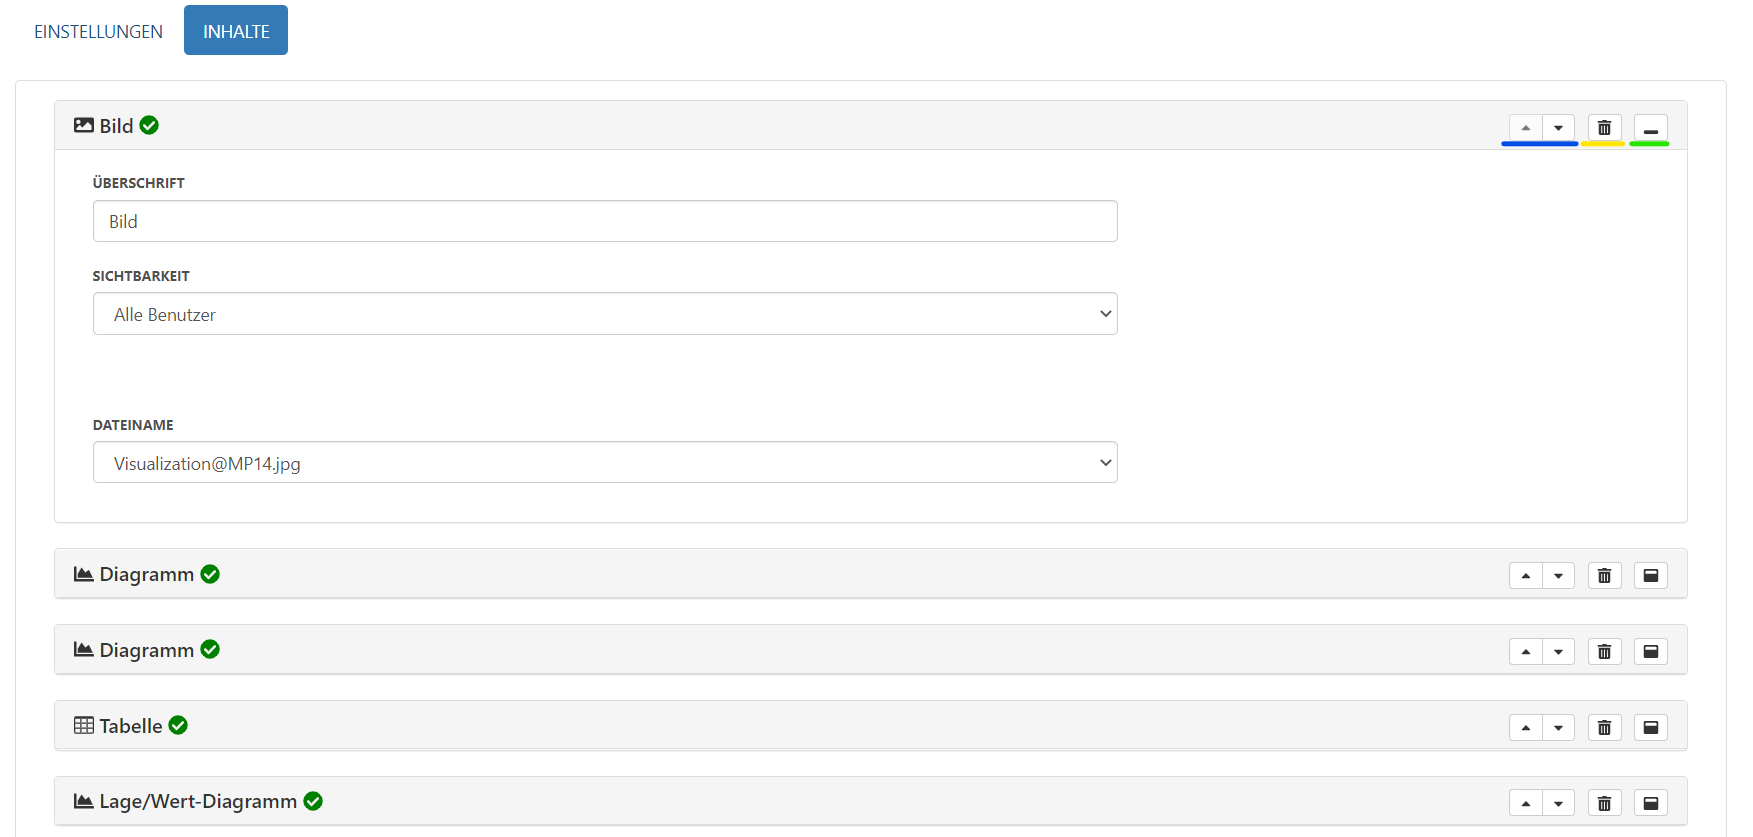
The buttons on the right side of each block offer further configuration options.
The two arrow icons ( ![]()
![]()
Example GIF:

The trash can icon (highlighted in yellow) deletes the corresponding block. After clicking on the icon, new icons appear in the block title bar. Click on the checkmark 


The minimize icon (
Once all the desired adjustments have been made, the changes can be saved with the "Save" button.
Edit an Existing Evaluation View
In the tab "Evaluation views" in the edit mode of a measuring point, all existing evaluation views of a measuring point are listed. An existing evaluation view can be edited by clicking on the edit icon 
The edit mode of an evaluation view also has the tabs "Settings" and "Contents", analogous to the creation of a new view. Here, the desired fields can be changed and modules can be adjusted. The procedure is analogous to the process in 1.1.. Save changes by clicking the "Edit" button.
Under point 2 you will find instructions on how to jump directly from the side of a measuring point to edit the currently selected evaluation view (Quicklink). If only a quick change to the current view is to be carried out, the process described there is generally faster in most cases.
Clicking on the arrow icon next to an evaluation view (![]()

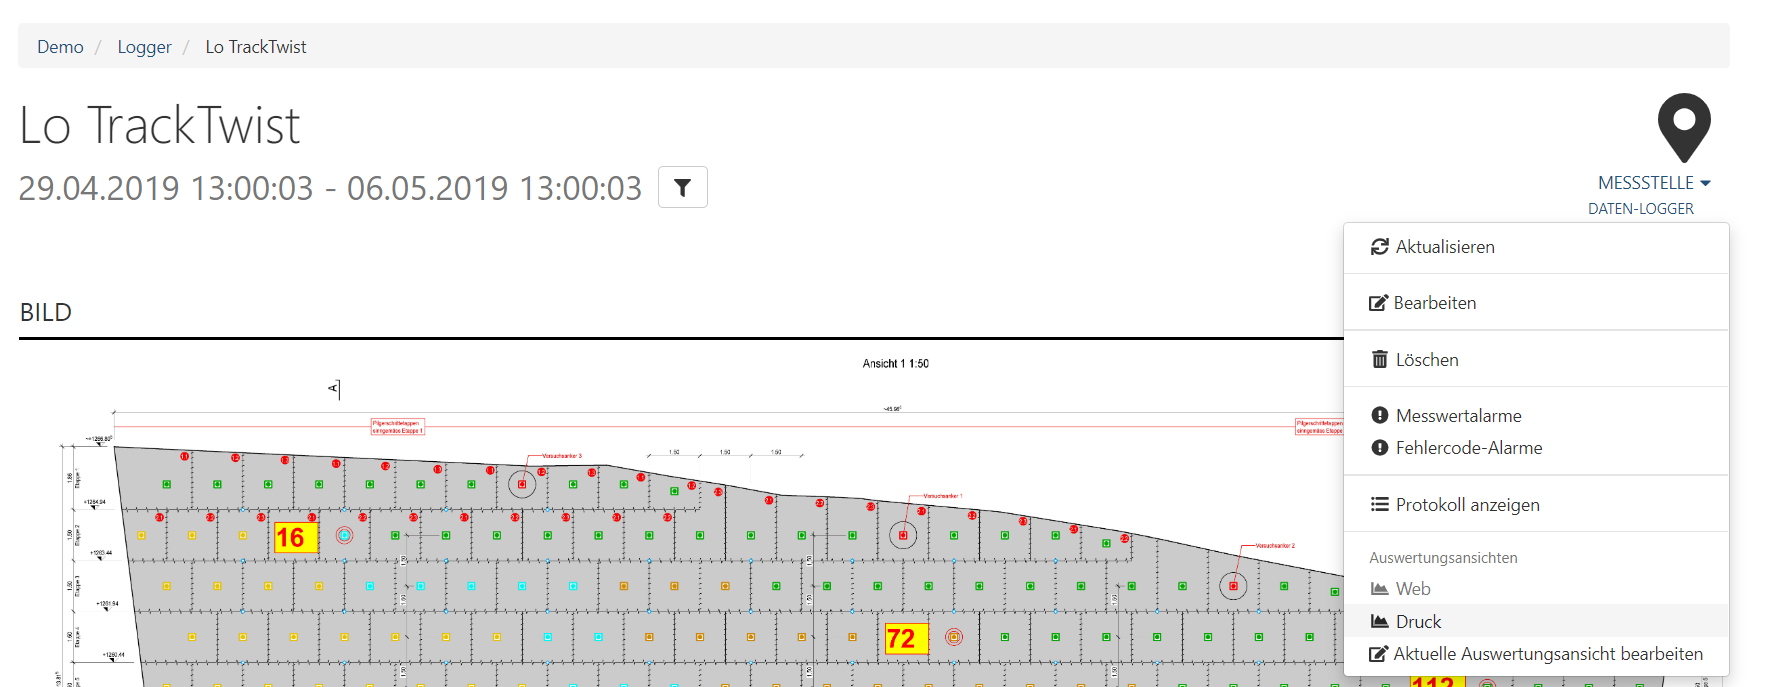
Use of Evaluation Views in the Web View
To switch between evaluation views in the web view on the page of the desired measuring point, click on the measuring point icon (
Clicking on "Edit current evaluation view" opens the edit mode of the currently used evaluation view.
Create Reports With Evaluation Views
To create a report, you first need a report template. The process for creating this is the same for all types of measuring points.
You can find all the information you need to create and manage report templates here.
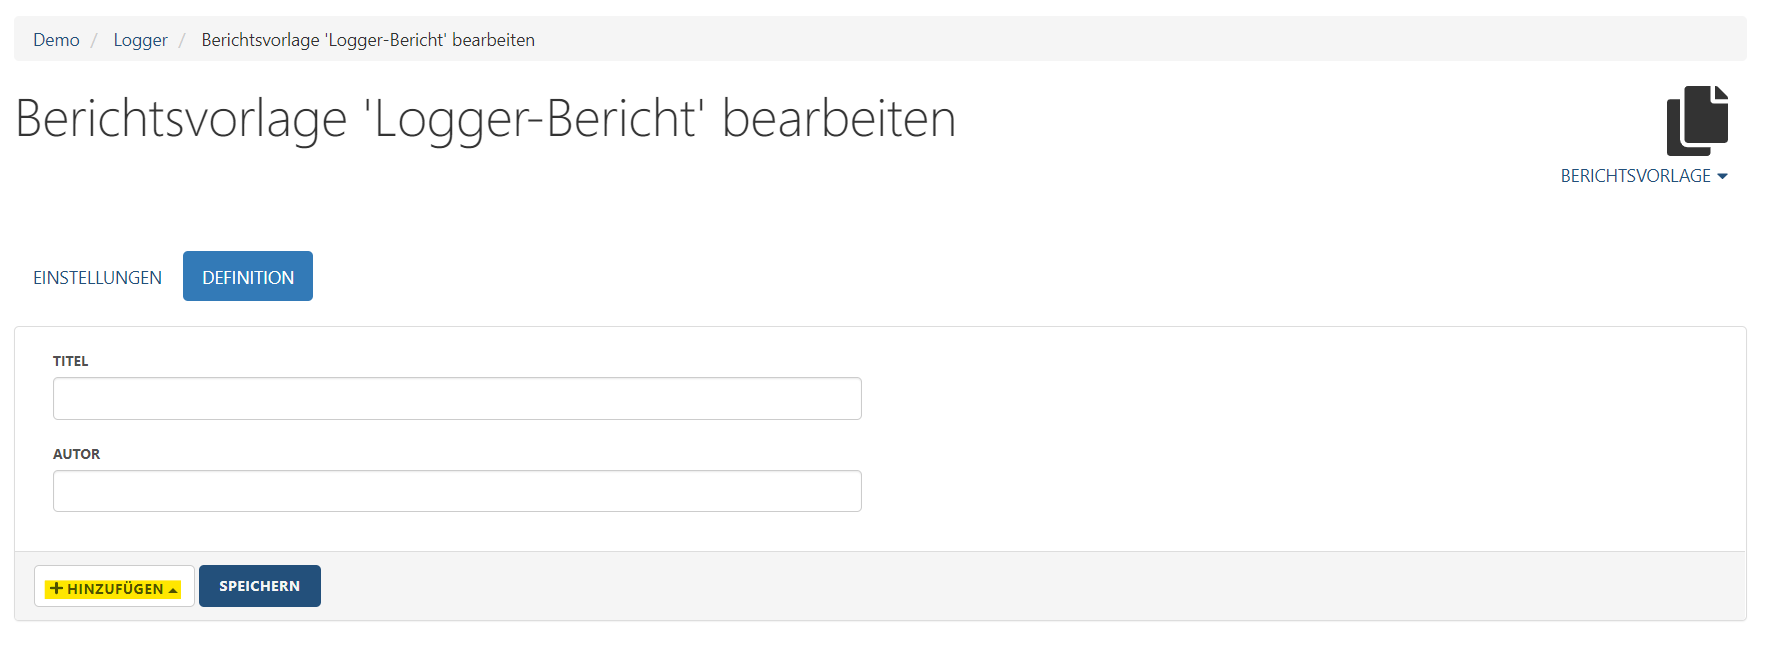
A new report template has two tabs: "Settings" and "Definition"
The changes that can be made under "Settings" are the same for all types of measuring point reports and are explained here.
The actual content of the report is now defined under "Definition". The procedure described below applies to the addition of measuring points of all types, apart from vibration measuring points.
The report template definition with measuring points of the type vibration measurement works differently than for the other measuring point reports. You can find help for the definition of a report for vibration measuring points here.
Open the "Definition" tab of the report template. First enter the title for the report template under Title and the author in the "Author" text box if required. Now click on the "Add" button.
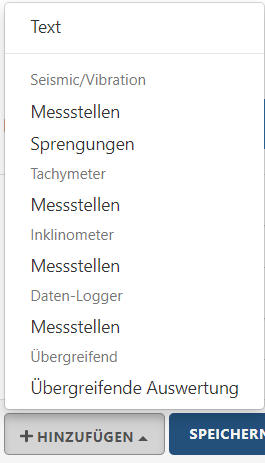
Now select the type of measuring point to be added to the template from the list.
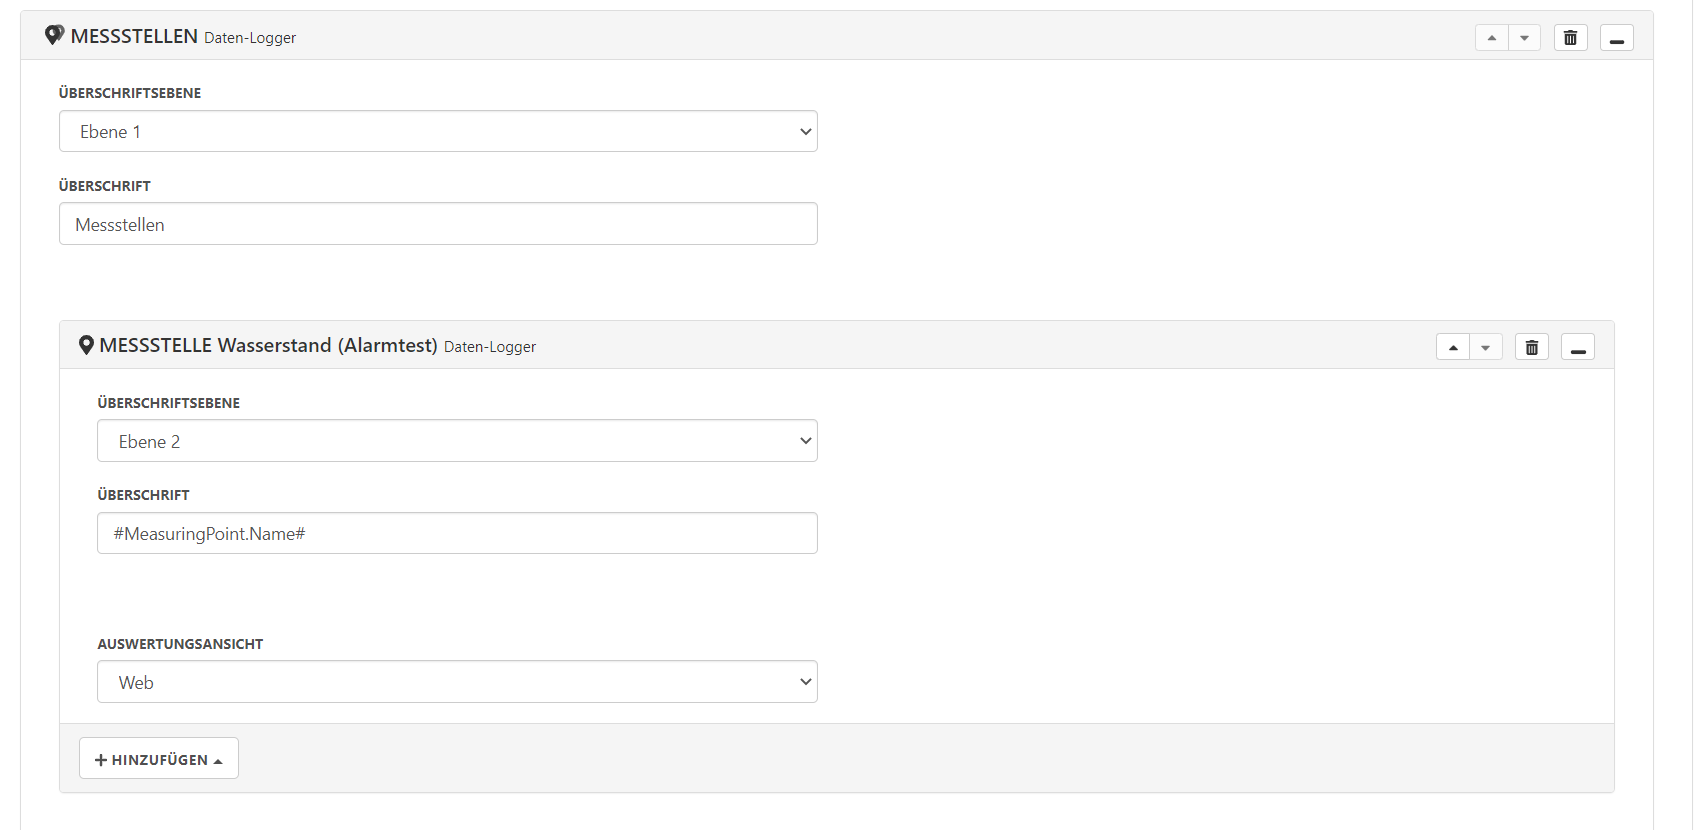
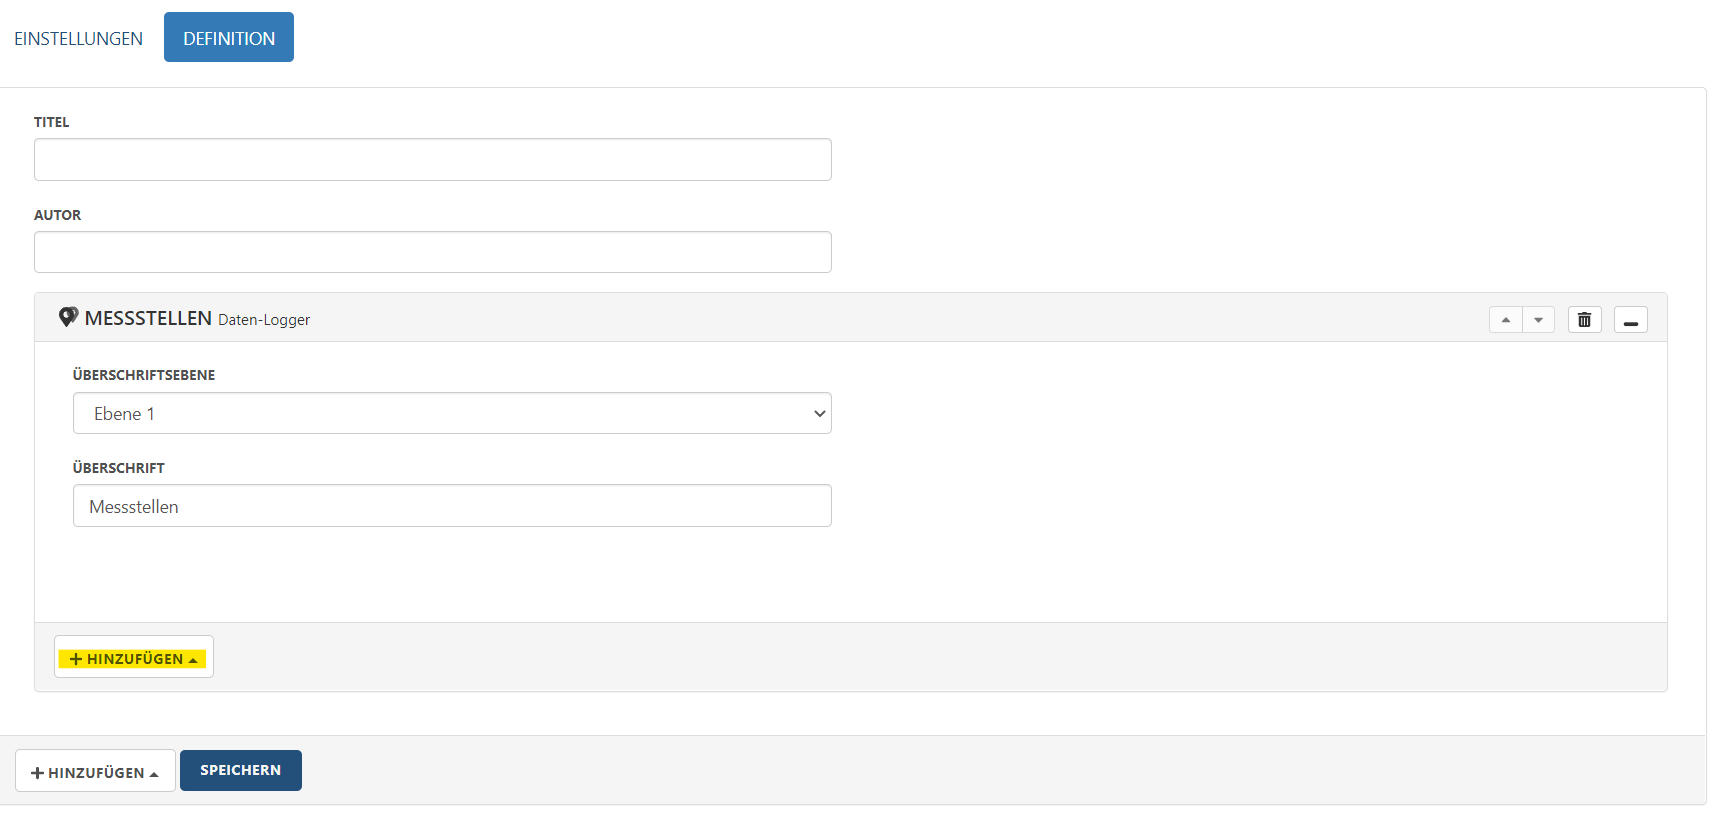
With the fields that now appear, the created measuring point area can be given a heading. The two fields are:
Heading level: Dropdown menu to define how the heading should be formatted according to the document template. For example, "Level 1" corresponds to the font formatting, "Heading 1" to the document template.
Heading: The text of the heading can be entered in this field.
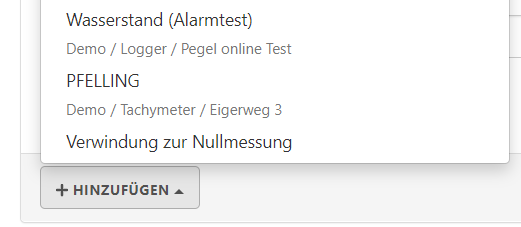
Clicking on "Add" in the area of the measuring point type adds a specific measuring point from the current Sedrix.
In the selection menu that now appears, all measuring points of the selected type present in the project are displayed. Select the desired measuring point by clicking on it.
The selected measuring point now appears in the report template. Any name for the measuring point can be entered here in the "Heading" field. With the placeholder #MeasuringPoint.Name#, the Sedrix name of the measuring point is automatically used as the heading for the report.
The field "Evaluation view" is the actual core of this module. Clicking on this field displays every evaluation view of the measuring point that can be used in reports. The desired view can be selected here. One advantage of the evaluation views is that you can check in advance how the measuring point is displayed in the report. To do this, call up the corresponding measuring point in the browser and switch the view to the evaluation view used in the report (provided that this is also available as a web view).
Use the "Add" button directly below the individual measuring point to place a freely definable body text below the measuring point.