Sedrix's report function provides a very convenient way of generating complex and comprehensive reports covering data from one or more measuring points for a definable period of time, more or less “at the touch of a button” (or “click of a button”).
In addition to this manual initiation of report generation by a user, Sedrix can also be configured (from version 2019.1) in such a way that Sedrix automatically and repeatedly generates reports for a certain reporting period according to a defined time scheme (for example, monthly for the respective last month).
Note: The generation of reports is possible for the tachymeter, logger and crossover evaluation modules, as of version 2020.R5.
For this purpose, so-called document templates are used. These are ultimately normal Word documents which essentially define the outward appearance (page layout, formatting, integrated graphics etc.) of the actual reports generated using them.
Unique, so-called report templates also need to be created in Sedrix. These essentially define the actual content based on the measurement data as a general structure (the so-called “report definition”) of the reports that will be generated later using the templates. These report templates also define the document template to be used (see above), the time zone and language of the report, as well as a default setting for the report time period.
When a report is actually generated, Sedrix combines the document template specified in the report template, that is the template that determines the outward appearance together with the definition that is also stored here and which specifies the content. This then forms an actual report document, again in Word format.
To edit document templates (and to (at least) read the report documents generated by Sedrix), you will require a program with which you can read and edit files in “Office Open XML” format (extension .docx). Currently only the use of Microsoft Word is possible.
Note on licensing: This feature requires separate licensing.
Document Templates
Document templates are normal Word documents that can contain on the one hand fixed text sections that should appear in each report generated using this template, or graphics that should appear on each page of the final report, such as a company logo, or a continuous page numbering system. On the other hand, it is also possible to enter special character strings, defined in Sedrix. These are so-called placeholders and are replaced by specific contents during the generation of an actual report document by Sedrix. Moreover, every Word document contains a certain style, which sets the font type and size to be used, the paragraph settings etc. for normal text, the headings for various levels within the document structure etc.
Note: With every new installation of Sedrix we also provide two example templates with the names Standard Word Landscape.docx and Standard Word.docx. These are available by default in each project and can be adjusted as required.
In this one-off preparation of your own document templates, carried out as appropriate, it is possible to give all of your reports a uniform appearance – keyword “corporate design”.
Adjustment examples:
Company logo in the header of the template – the logo appears on each page of the report itself.
Page numbering in the footer of the template – each page of the report itself has a consecutive page number.
Name of the person doing the editing in the footer of the template – the name appears on each page of the report itself.
Text in the main text section of the report, e.g. at the beginning as a fixed introduction – the text appears once at the beginning of the report itself.
Use of so-called placeholders in the template – specific contents appear where the placeholders are located once the report itself is generated.
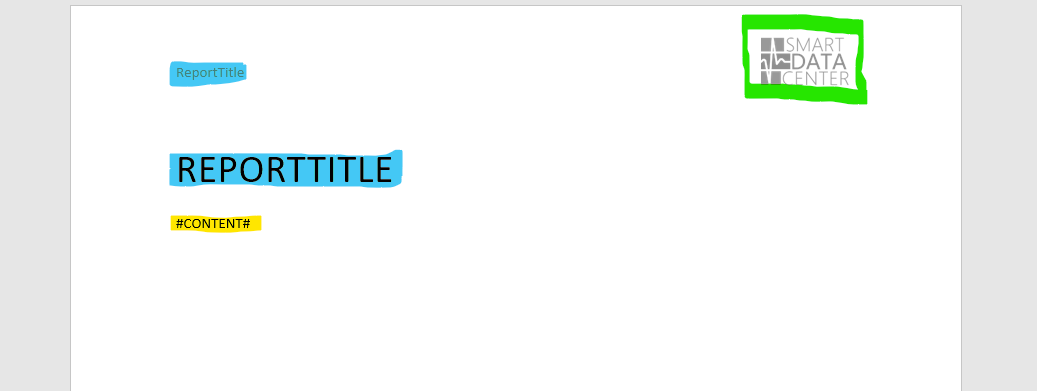
On the right is an example of a document template, the Standard.Word.docx example template already included in Sedrix. The content area of the document is highlighted in yellow; in a generated report, the report content would be placed here.
At the top right (outlined in green) there is an example of the placement of a company logo as an image file on the report; this could, for example, be replaced by your own company logo in order to visually adapt the report.
An example of the use of a placeholder is marked in blue:ReportTitle. In this case, instead of the placeholder, the corresponding title of the generated report is always used and used as the heading for the report and in its header. Placeholders can be used to add variable elements of a report within a template.
Placeholders are fixed character strings, defined in Sedrix, which should be quoted directly in your document templates in order to render specific contents from Sedrix in the final report document. Sedrix recognizes these character strings in the document templates used and replaces them with the respective contents.
Note: An amended notation for placeholders was added in version 2.11, as the previous notation caused issues in Word (starting and ending with a hash, i.e. the sign #). The new notation avoids special characters (such as #) and uses the so-called “camel case” notation (this means that each word in a placeholder begins with an upper case letter, followed by lower case letters; in the case of more than one word, they follow each other without spaces between the words). Since this format is uncommon in normal use, the undesired replacement of text is unlikely (see also the following note).
The following placeholders are currently available in a document template:
GeneratedContent: Applies the defined content of the report as given under "Definition" in the report template (see Report Templates). Important: this placeholder is absolutely necessary! It may however only be used once in the text of a document!
ReportTitle: Applies the character string given in the “Title” text field under “Definition” in the report template as the title of the report.
ReportAuthor: Applies the character string given in the “Author” text field under “Definition” in the report template as the author of the report.
ReportStartDate: Adds the date of the starting point of the report.
ReportStartTime: Adds the time of the starting point of the report.
ReportEndDate: Adds the date of the end point of the report.
ReportEndTime: Adds the time of the end point of the report.
Important: Take care not to use any of these placeholders reserved for the generation of reports in your fixed template text, in order to avoid any undesired text replacement!
Important: When adding or changing placeholders in a template, make sure that you always re-enter the entire placeholder (the entire character string)! If you only change parts of a placeholder, it is possible that the word processor divides the string into several parts when saving the template (by inserting formatting commands (XML tags) into the string – which is however not visible in the word processor). This means that Sedrix cannot correctly replace such a placeholder!
Manage Document Templates
The document templates required for the creation of report templates can be managed via the “Document Templates” menu command in the main menu.
If necessary, switch to the project that contains the document templates you wish to manage.
Click on the “hamburger” icon to open the main menu.
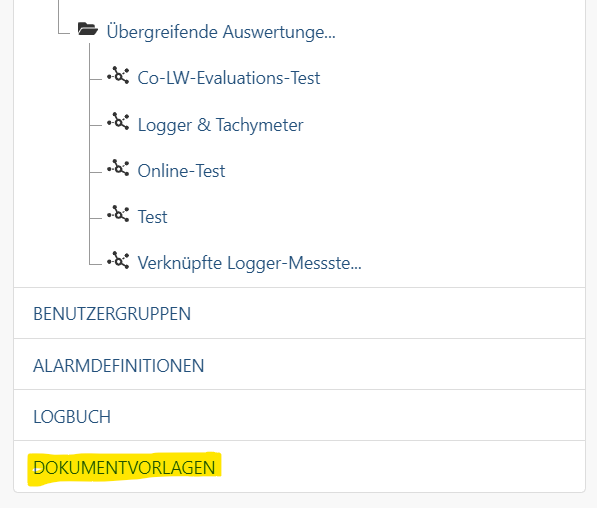
Click on “Document Templates” below the project tree.
Here you can carry out the desired action:
To download an existing template:
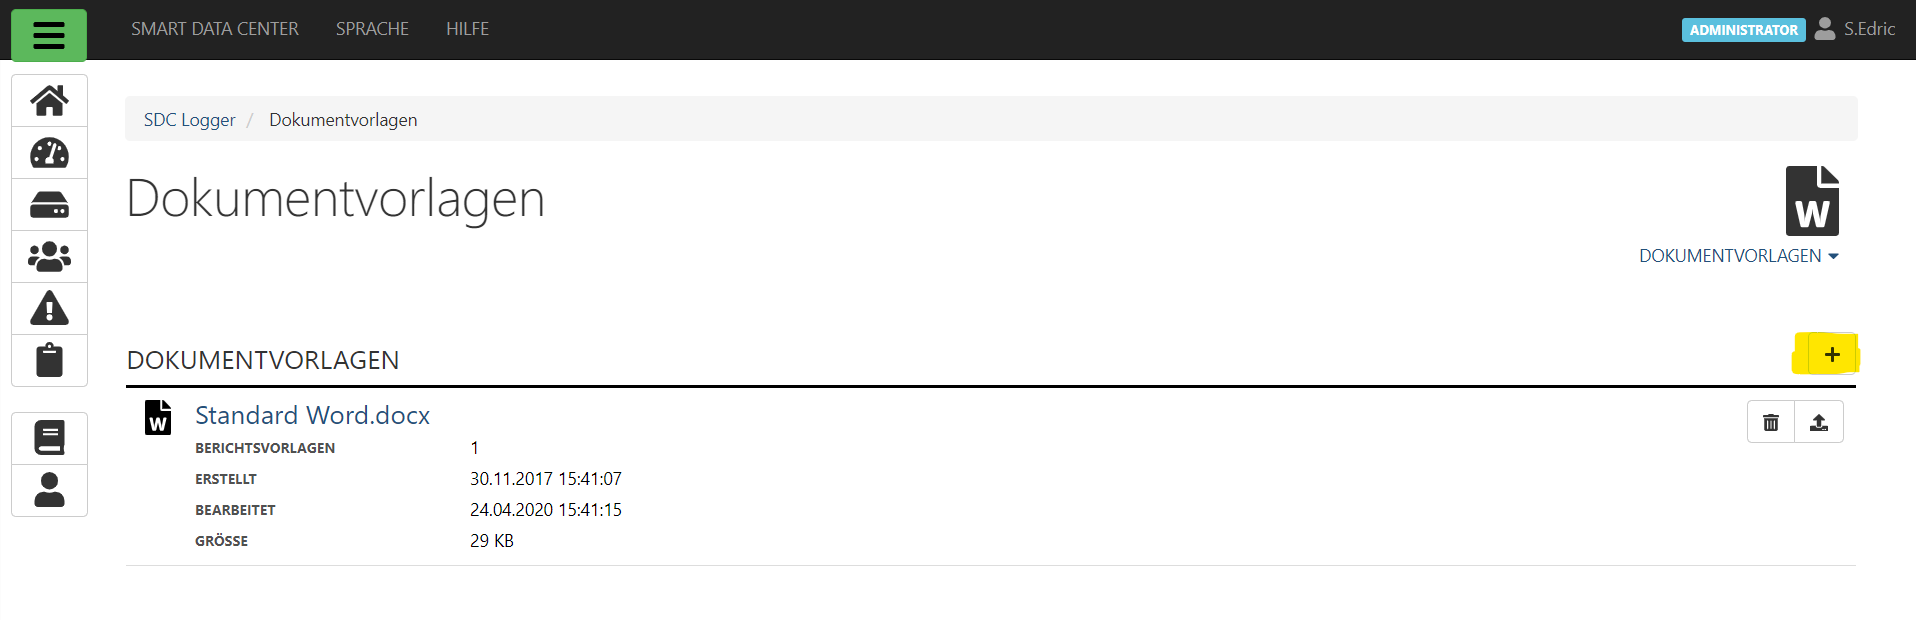
Click on the name of the template – this is executed as a download link – and select the desired option in the download dialog of your browser.
To import a new template from your local computer into Sedrix:
Click on the “Add” icon in the top right
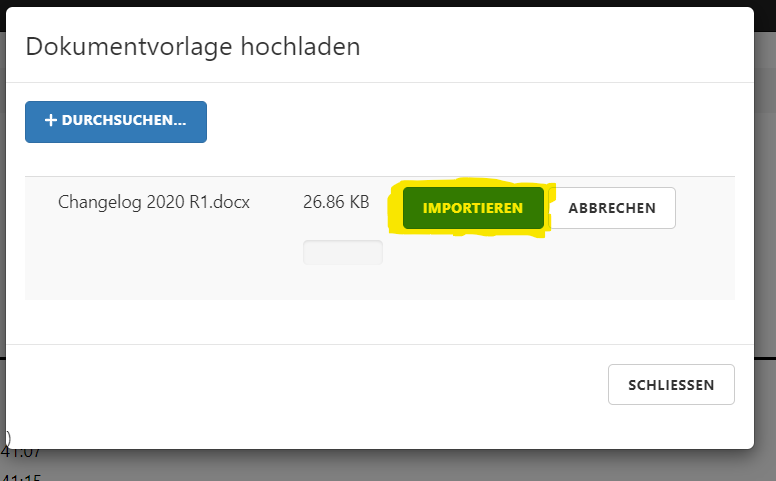
b. Click on “Search” in the window that opens and then use the file dialog to select the desired template from your local computer.
c. Click on “Import” to import the selected document template.
To replace an existing templatewith a new version:
Click on the “Upload” icon to the right of the template that is to be replaced
Click on “Search” in the window that opens and then use the file dialog to select the desired template from your local computer.
Click on “Import” to import the selected document template.
To delete an existing template:
Click on the “waste bin” icon to the right of the template that is to be deleted
Click on “Delete” in the window that opens, if you are sure you want to delete the template. Click on “Cancel” to cancel the process.
Report Templates
As outlined previously, a report template essentially determines the document template to be used. A report template also uses the so-called (report) definition (see below) to determine the actual contents within a general structure for the reports that will be generated using it. A report template also defines the time period which the report covers, along with the time zone and the language of the report. A number of properties must be defined accordingly for a report template. For the sake of clarity, they are divided into the following main sections:
A number of properties must be defined accordingly for a report template. For the sake of clarity, they are divided into the following main sections:
Properties main tab
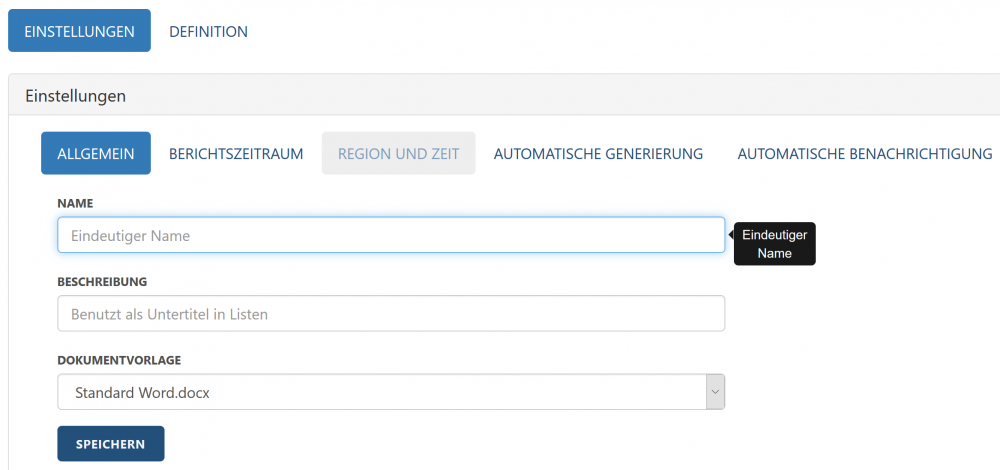
Here, you can set general properties:
In the “General” tab, the name of the template and the document template to be used.
In the “Time Period” tab, the period of time that the report should cover.
In the “Time and Region” tab, the time zone and language of the report.
From version 2019.1, there are two further tabs here to specify the automatic generation of reports . This can be set as desired.
In the “Automatic Generation” tab, properties concerning the schedule of the automatic generation of reports can be set.
In the “Automatic Notifications” tab, properties concerning notifications about automatically generation reports can be set.
In this tab, the actual content of the report within a general structure is determined. This is done by gradually adding so-called content sections as "information blocks". A content section can be for example a section of text, either given word for word or as a placeholder (that is, a certain character string that exists in place of a certain section of text and is replaced by the actual content once the document is created), or a list of measuring points, or a vibration event, etc. For each content section, certain sub-sections are possible, so that the structure of a report definition generally consists of successive, nested content sections. See the graphic.
This (nested) structure is also made clear in the report template view through the use of outlined boxes for each content section.
As mentioned above, it is also possible to specify content in a general form through the use of placeholders (variables). These are replaced by actual content when the report document itself is created, for example the names of the measuring points included in the report. See Placeholders For Report Templates.
These things, described quickly here, may appear somewhat complicated. They will be explained further in the following section (Example – Create A Report Definition) using a simple, coherent example of what is basically a very intuitive process.
#Report.Start#: Adds the start time of the reporting period.
#Report.End#: Adds the end time of the reporting period.
Both placeholders can be used in the text of “text” content sections as well as in the headings of all content sections. To specify the reporting period, see the “Report Time Period” tab in Report Template Properties – Settings.
Measuring points
“Measuring points” content section (defines a list of measuring points)
Currently no placeholder.
“Measuring point” content section (defines the content for one measuring point)
#MeasuringPoint.Name#: Adds the name of the measuring point.
Events
“Events” content section (defines a list of events)
Currently no placeholder.
“Event” content section (defines the content for one event)
#Event.TriggerTime#: Adds the trigger time of an event.
#Event.Comment#: Adds the event comment.
Both placeholders can be used in the “Heading” field of the “Event” content section, in “Text” content sections, and in the “Event Comment” within the “Event” content section. Note: An “Event Comment” content section contains by default the text #Event.Comment# (strictly speaking, this type of content section is simply a “text” content section containing this specific default text, as is also evident from the representation of the content area in the Edit view).
Blasting operations
“Blasting operations” content section (defines a list of blasting operations)
Currently no placeholder.
Manage Report Templates
The report templates required to create reports are defined at the folder level. This means that you can manage report templates in the Data area of the respective folder (Folder View). First switch to the desired folder, by clicking on its name in the project tree (reached via the main menu). If necessary, switch to the correct project).
All report templates previously created in a folder are listed as a “Report Templates” table in the “Reports” tab of the folder view. Beside the name of the report template, the table also lists the following essential properties:
the recipients of notifications concerning the generation of a report, if automatic notification is activated (“user group” column)
Interactive options:
Sort: Click on a column to sort the table according to its values.
Search: Enter a search term in the search field in the top right above the table (incremental search).
Create a new report template: Click on the Add button (see below).
Edit a report template: Click on the “Edit” button (see below).
Delete a report template: Carry out the “Delete” command in the context menu of the Edit mode of the report template you wish to delete (see below).
Whether a user is able to view the report templates table and which of the interactive options are available to them depends on their user rights. In order for the table to be displayed, the right to edit report templates is required (the activity “Edit” should be selected for the resource “Reports” in the respective user group). Deleting report templates requires the right to delete (the activity “Delete” should also be selected).
Create new report template
Proceed as follows to create a new report template:
Click on the “Add” button above the “report templates” table in the “Reports” tab of the Data area.
In the mask that opens, specify the properties of the new report template in both the Settings and Definition sections.
Click on “Save” to save your changes.
Exist existing report template
The properties of a report template can be changed at any time. Proceed as follows to edit an existing report template:
In the “report templates” table, click on the “Edit” button beside the report template to be edited. This opens the Edit mode.
Set the new properties for the report template in both the Settings and Definition sections.
Click on “Save” to save your changes.
Delete existing report template
Proceed as follows to delete an existing report template:
In the “report templates” table, click on the “Edit” button beside the report template to be deleted. This opens the Edit mode.
Select the “Delete” command from the context menu that is opened via the “report template” icon in the top right.
Click on “Delete” again in the confirmation prompt in order to actually delete the report template. If you realize that the wrong report template has been selected for deletion, the process can be cancelled by clicking on “Cancel”.
Duplicate Report Templates
Report templates can also be created via duplicating (“cloning”) a report template that already exists in the same folder. That means that rather than creating and configuring a new report template from scratch, an existing template that is as suitable as possible can be duplicated. The copy can then be adapted as necessary. This saves a lot of time, especially when there are many “similar” report templates to be produced.
Proceed as follows to duplicate (“clone”) an existing report template:
Open the folder view in which the report template being duplicated is defined.
In the “Reports” tab, click on the “Duplicate” icon at the end of the row belonging to the report template which is to be the template for the new report template.
Enter the following properties in the dialog window that opens:
Name Text field to enter the name of the new report template. Default: Name of the template (that is, the duplicated report template), followed by the character string (copy).
Folder Dropdown menu to select the folder in which the new report template is to be assigned. The dropdown menu contains all folders within the project tree. Default: Folder of the template. By selected another folder as the “target”, the new report template can then be assigned to a different project folder.
Finally click on “Save”, to create the new report template. Once it has been saved successfully, you will automatically be redirected to the folder view of the folder that was specified under “Folder” (see above), so that the duplicate can be edited. Open the Edit mode of the duplicate by clicking on the “Edit” button in the row belonging to the duplicate in the “Reports” tab. The duplicate report can be configured as necessary.
Report Template Properties - Settings
General tab
Name Text field to specify the name of the report template. The name must be unique within the project. Default for a new report template: “Created on …”.
Description Text field to specify an optional field for e.g. the purpose of the report template.
Folder Dropdown menu to select the folder to which the report template is assigned.
Document template Dropdown menu to select the document template to be used
Reporting Period tab
Here, you can
define a fixed time period with a start and end time – “Use fixed time period” switch ON. or
select a relative time period – “Use fixed time period” switch OFF. In this case, the start and end time for the report depends on the time of its generation. If “Current week” is selected, for example, then the report will cover the current week.
Region and Time tab
In this tab, the language, region and time zone can be selected for a report. The project properties are used by default.
Activate automatic report generation Slide switch to de/activate the automatic generation of reports. Default: “No” (automatic generation is deactivated). The following entry fields are only made available/active once the automatic generation of reports is activated.
Start time Date selection element to specify the date at which the automatic report generation should begin.
End time (optional) Date selection element to specify the date at which the automatic report generation should end.
Execution time Date selection element to specify the time at which each report is to be generated.
Repetition interval Dropdown menu to select a repetition mode. The following modes are currently available: “Daily”, “Weekly”, “Monthly”. Depending on the mode selected, further entry fields will be shown in order to specify the mode further (self-explanatory).
Automatic Notifications tab
The settings here are used to specify the notification of certain users that a new automatically generated report is now available.
Send notification to user group Slide switch to de/activate the automatic notification concerning new reports. Default: “No” (automatic notification deactivated). The following entry fields are only made available/active once automatic notifications are activated.
User group Dropdown menu to select a user group, the members of which should be informed about the completion of an automatically generated report.
Subject Text field to enter what the notification is about (used as the subject line in a notification sent via email).
Short message (e.g. for SMS) Text field to enter a short form message (used as the contents of a notification sent via SMS).
Important: In order to receive notifications of this type, the sending of notifications must not be deactivated for a user. See User Properties - Notification Settings, slide switch “Deactivate notifications”. The type of such notification – via e-mail, SMS, or both – is also specified for the user in the “Communication channel for notifications” setting in the user properties.
Note: The blue “Available placeholders” box shown in the view gives information about the placeholders that can be used to compose notification messages.
Report Template Properties - Definition
The actual content of the report is defined under “Definition”. The procedure for vibration measuring points differs from all other types of measuring points.
First there is the explanation for the general report template definition, then a separate part specifically for the definition of report templates with vibration measuring points.
Report Template Definition - General
The actual content of the report is defined under “Definition”. The procedure described below applies to the addition of measuring points of all types, apart from vibration measuring points.
The report template definition with vibration measuring points works differently than for the other measuring point reports. You can find help for the definition of a report for vibration measuring points here.
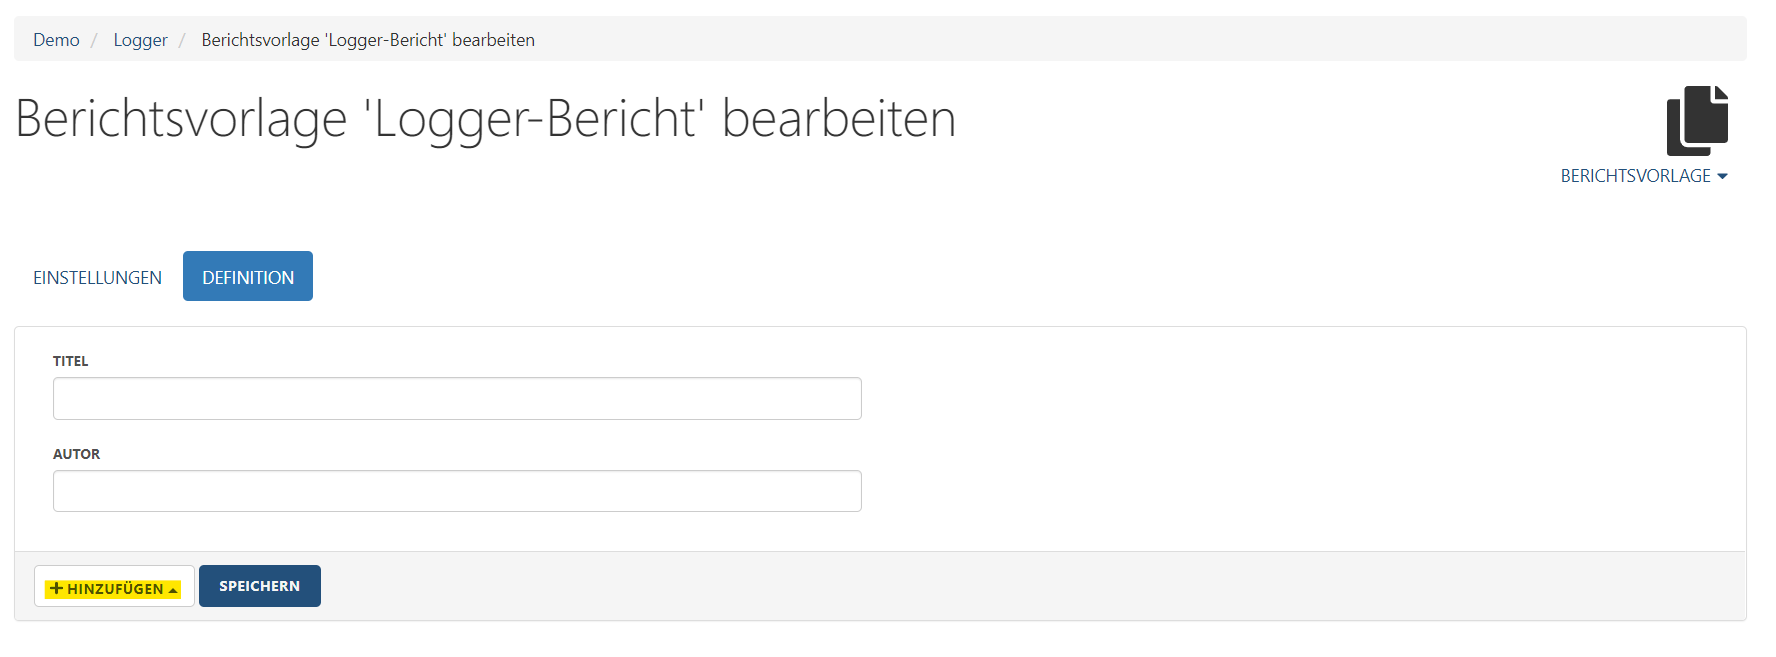
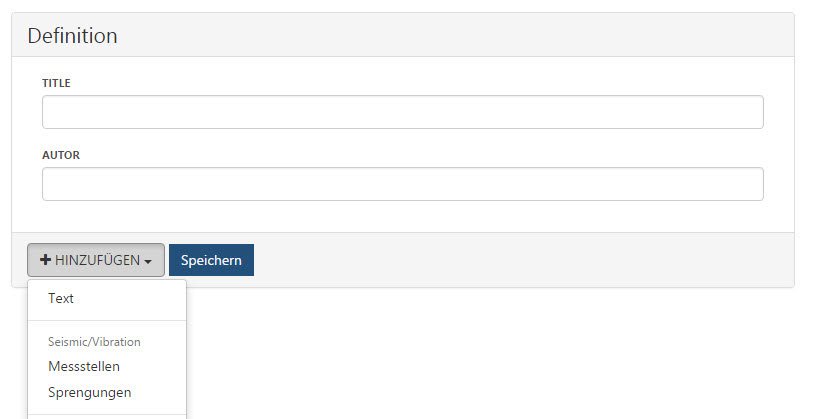
Open the “Definition” tab of the report template. First enter the title for the report template under Title and the author in the “Author” text box if required. Now click on the “Add” button.
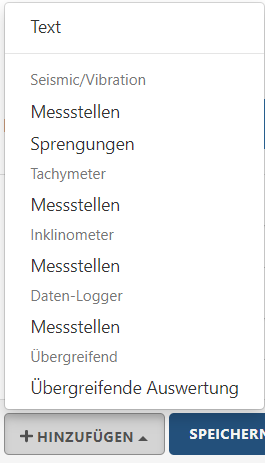
Now select the type of measuring point to be added to the template from the list.
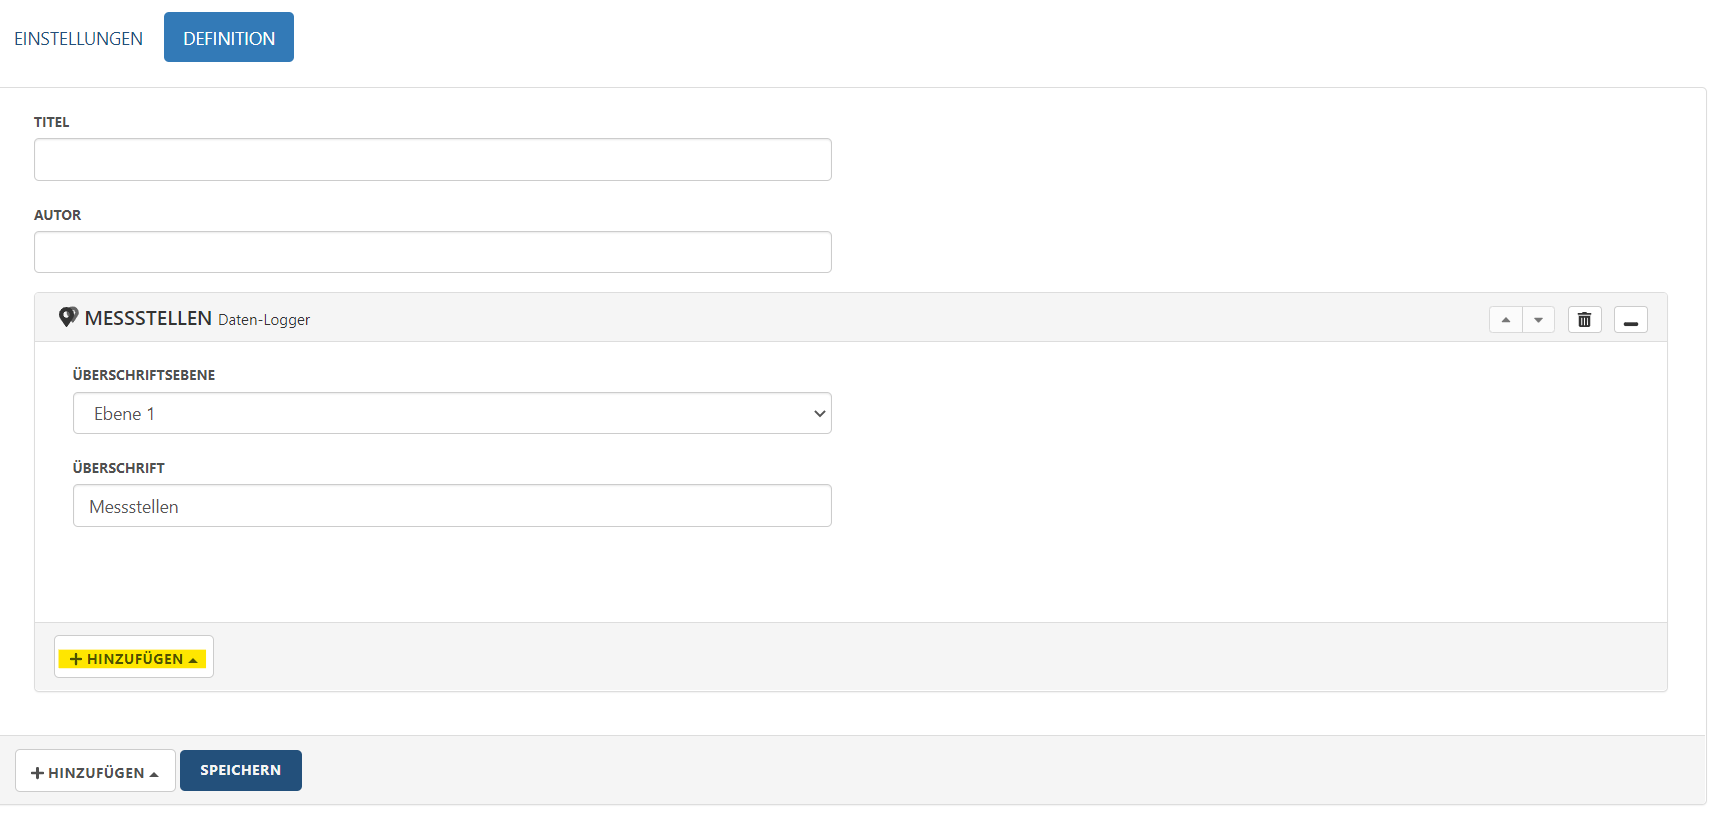
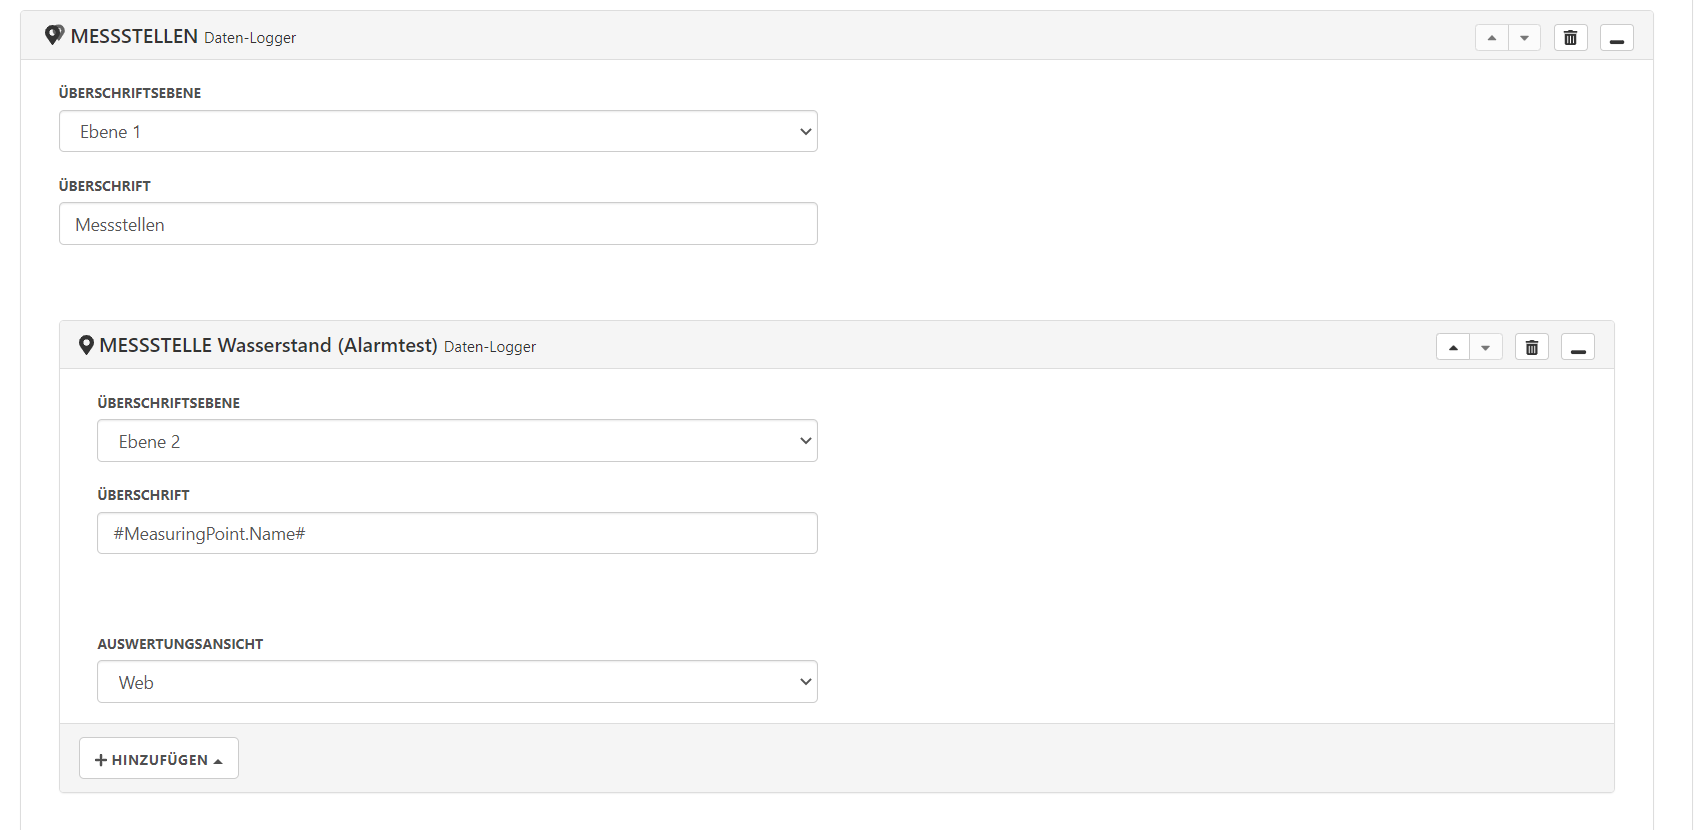
With the fields that now appear, the created measuring point area can be given a heading. The two fields are: Heading level: Dropdown menu to define how the heading should be formatted according to the document template. For example, “Level 1” corresponds to the “Heading 1” font formatting of the document template. Heading: The text of the heading can be entered in this field.
Clicking on “Add” in the area of the measuring point type adds a specific measuring point from the current Sedrix.
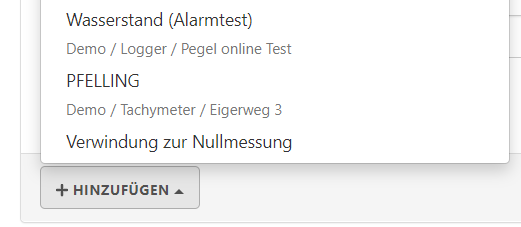
In the selection menu that now appears, all measuring points of the selected type present in the project are displayed. Select the desired measuring point by clicking on it.
The selected measuring point now appears in the report template. Any name for the measuring point can be entered here in the “Heading” field. With the placeholder #MeasuringPoint.Name#, the Sedrix name of the measuring point is automatically used as the heading for the report.
The “Evaluation view” field is the actual core of this module. Clicking on this field displays every evaluation view of the measuring point that can be used in reports. The desired view can be selected here. One advantage of the evaluation views is that you can check in advance how the measuring point is displayed in the report. To do this, call up the corresponding measuring point in the browser and switch the view to the evaluation view used in the report (provided that this is also available as a web view).
Use the “Add” button directly below the individual measuring point to place a freely definable body text below the measuring point.
Report Template Definition: Vibration Measuring Point
First enter the title of the report template under Title, and the author of the report under Author.
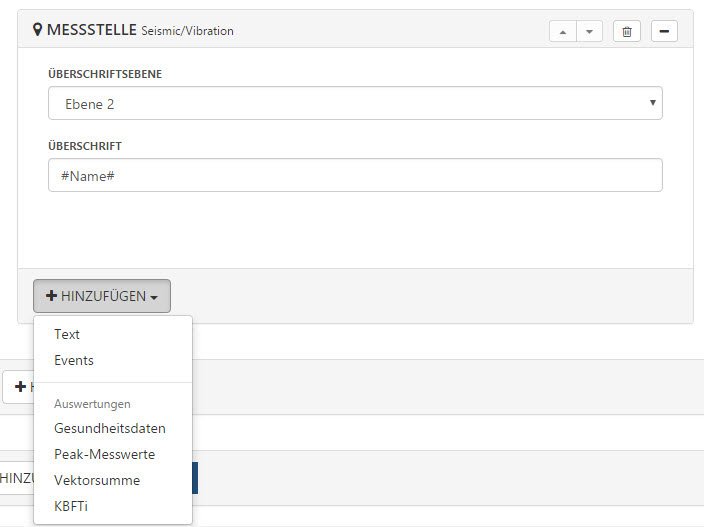
Click on the “Add” button. This opens a menu window (see above image), in which you can select the respective contents, depending on your license and the modules used.
Further fields are shown, in which you can enter the following:
Heading level Dropdown menu to set how the heading should be formatted according to the document template. “Level 1” corresponds here to “Heading 1” of the document template, for example.
Heading Text field to enter the heading text.
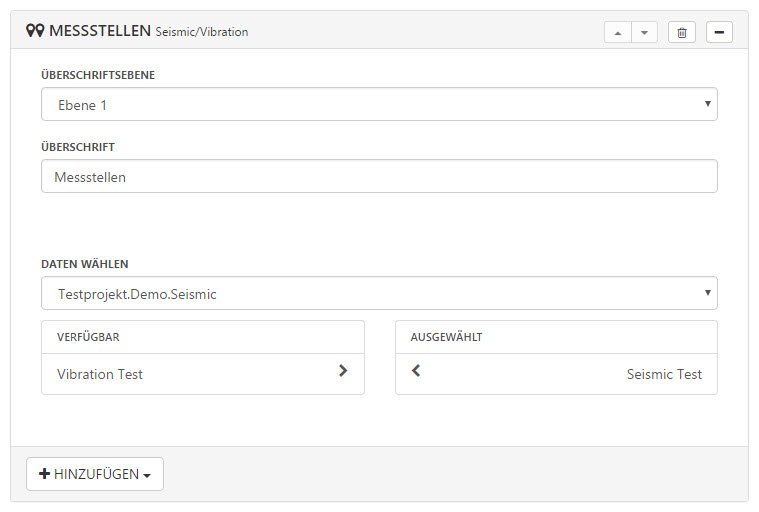
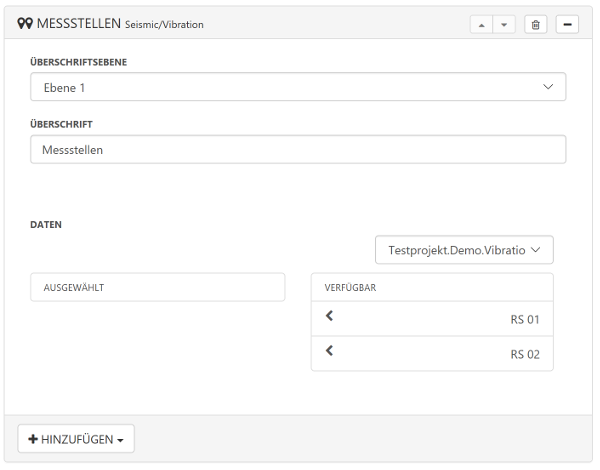
Select data
Dropdown menu to select the folder that contains the necessary measurement data for the report. A list of available folders is shown when you click on the arrow.
Available (on the left) List of available measuring points in the selected folder. In order to select an available measuring point for the report, click on the arrow on the right of this measuring point’s row. It will then be moved automatically to the “Selected” section (see below).
Selected (on the right) List of the selected measuring points In order to deselect a measuring point that is displayed here (to undo its selection), simply click on the arrow in front of the measuring point. It will then be moved automatically back to the “Available” section (see above).
No actual data has been selected yet. To do this, click on the “Add” button in the “Measuring points” content section. Set the heading level and enter a heading. if you enter the placeholder #Name# under “Heading”, the name of the respective measuring point selected in the next level will be entered.
Finally click on the “Add” button to actually select the data, i.e. events or evaluations, that you wish to include in the report. Depending on the selection, further fields will appear, in which you can make further entries.
If you wish to add further contents, click on “Add” again in the respective level and select the desired data.
At the end of the row containing the content heading, the following controls are shown:
Arrow buttons The order of the data shown in the report corresponds to the order of the data shown here. If you wish to change the order, click on these arrow keys. The order will change accordingly.
Delete This allows you to delete all of the content.
“+” or “-” Maximize or minimize the display of the respective content.
Click on “Save”.
The structure of the report template definition can be represented as follows:
In the following section, this process is explained using a concrete example.
Create Report Definition Example - Vibration Measurement
In a report definition, the actual content of the report being generated is set.
So-called content sections can be added to the report using “Add”. The available selection depends on the license in use. Each content section can contain further content sections and generally has a heading.
Example: Interval data for a velocity measuring point
First of all, the “Measuring point” content section is added:
Measuring point” was selected as a heading in level 1. This corresponds to the “Heading 1” template in Word. Under “Select data” (or under “Data” as in the screenshot from version 2.10), all measuring points can now be selected that are to be used in this content section.
How should the data from these two measuring points be displayed? A diagram with the interval data will be created for each measuring point. For this purpose, another “measuring point” content section is added – within the “measuring points” content section that was already added. This section applies to each selected measuring point in the current content area:
The heading is created in level 2. #MeasuringPoint.Name# (or #Name# as in the screenshot from version 2.10) is a placeholder for the name of the measuring point.
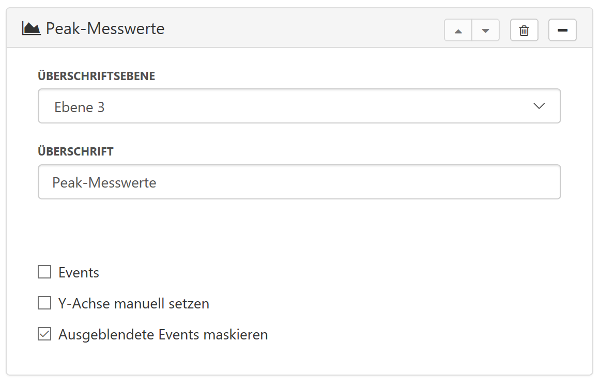
The “Peak measured value” evaluation is added to the “Measuring point” content section via “Add”.
The evaluation can be parameterized so that hidden events are not shown in the background data or the axis is selected manually, for example.
Diagrams were generated for the two measuring points “RS01” and “RS02” during the reporting period. No data was available for measuring point “RS02” during this period, which is why the output “No data available” under the corresponding heading occurred.
Based on the current status, the report definition could now be expanded by further evaluations and content areas, e.g. to generate the time diagrams of all events.
Create Report
Once you have created a suitable report template as a one-off preparation (including the document template adapted to meet your requirements, which is included in the report template) as described in detail in the previous sections), creating the report itself using the report template happens very simply with a click of the mouse. You only need to set a time period for the data to be used in the report and, if necessary, change the default name of the report file to be generated.
Proceed as follows:
Switch to the folder for which a report is to be created by clicking on its name in the project tree (reached via the main menu). If necessary, switch to the correct project. This is similar to the process of creating a report template, see Manage Report Templates.
Click on the “Reports” tab.
In the view that opens, a list of all report templates created for the folder is displayed under “Report Templates”.
To create a report, click on the “Play” button
beside the desired report template.
Specify the following in the “Create Report” dialog window:
the desired reporting period, by entering the start and end time in the respective date-selector elements. Default for the end time: the date and time that the folder view was loaded. Default for the start time: end time – 1 hour.
the file name of the report data (without the extension .docx). Default: Name of the report template.
Finally click on the “Create Report” button, to start generating the report (the actual report generation is then carried out by another process).
The report file is usually created after a few seconds and is listed on the right under “Reports” along with details of the creation date, the name of the document template used and the file size. It can also be downloaded from there by clicking on the name of the report.
Reports generated in this way can be viewed in the “Reports” tab in the folder view and can be downloaded to your local computer. See Manage Reports.
Sedrix can also be instructed to automatically create reports at predefined times. See Automatic Report Generation.
Note: Sedrix keeps a log of report creation, in which, along with the process of creating the report (requesting the report, start and end time of the report generation), any warnings and errors which may have occurred during the process are logged. This provides you with information about what caused the errors. You can find this log on the detail page of the respective report, under “Log”. The detail page itself is displayed when you click on the name of the report in the “Reports table”, found in the “Reports” tab within the folder view.
Automatic Report Generation
In addition to manually triggering report generation, Sedrix can also generate reports automatically according to a user-defined schedule (from version 2019.1). For example, you can specify that a report should be generated for the previous month at the beginning of the new month. It is also possible to determine a group of recipients who are to be informed automatically by email about the completion of an automatically generated report.
If you have activated the automatic notification regarding completed reports, the users belonging to the specified user group will receive a notification according to the user settings.
Important: To receive notifications of this type, the sending of notifications must not be deactivated for a user, see User Properties - Notification Settings, slideswitch “Deactivate notifications”. The form of such a notification – email, SMS, or both – is also defined in the user properties for the user via the “Communication channel for notifications” setting.
You can also view the automatically generated reports in the “Reports” tab in folder view, and download them to your local computer, see Manage Reports.
Manage Reports
All reports that have been generated in a folder are listed as a “Reports” table in the “Reports” tab in the folder view. If the user has the right to edit report templates, this table is shown under the “report templates” table (see Manage Report Templates).
Interactive options:
Sort: Click on the column containing the values according to which you want to sort the table.
Search: Enter a search term in the search field in the top right above the table (incremental search).
The names of completed reports are displayed as links – clicking on such a link starts the download of the stored Word document to your local computer.
The names of reports that have not yet been completed are marked with a blue label with the text “Scheduled …”.
The names of the report templates on which a report is based are displayed as links – clicking on such a link opens the edit mode of the report template (like clicking on the “Edit” button in the “report templates” table. See Manage Report Templates).
Delete a report: Click on to the right in the line of the report to be deleted. A delete dialog opens with a confirmation question. Here you can confirm the deletion by clicking “Delete”, or you can cancel it by clicking “Cancel”.
Whether a user is able to view the reports table and which interaction options are available to them depends on the user's rights: At least the right to read reports is required to display the table (at least the “Read only” activity selected for the “Reports” resource in the user group), and the right to delete reports corresponds to the right to delete (“Delete” activity selected).
JavaScript errors detected
Please note, these errors can depend on your browser setup.
If this problem persists, please contact our support.