Exporting a table or diagram With only a few exceptions, data can be exported from any table or diagram via the export button. The format can be entered in the corresponding dialog.
Immediate export This allows all tables and diagrams of an evaluation view to be exported at once for the current period. The settings of the evaluation view are used as the format.
Automatic data export Measurement data from measuring points can be automatically exported according to a specified time program and automatically uploaded to an FTP server, for example.
Export via Web API Measurement data from measuring points can also be exported via a web-based programming interface.
Exporting vibration measurements For measurement data from vibration measuring devices, there is also the option of exporting both background data and event data via the context menu for devices or measuring points. The formats can be selected in the export dialog.
An automatic data export is planned but currently not available for vibration data.
How can a table be exported?
Proceed as follows to export data from a table:
First switch to the measuring point view of the measuring point from which you wish to export data.
If necessary, use the SmartFilter settings to select the desired time period for which data should be exported.
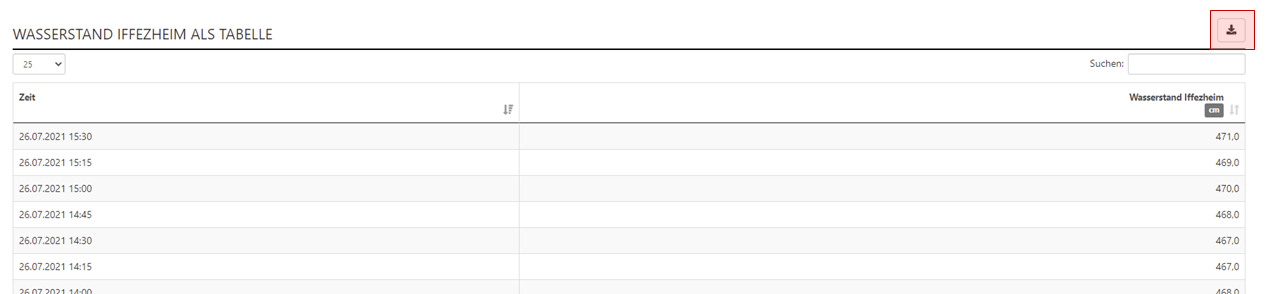
Then click on the "Download" button (
) above the table from which data is to be exported. This starts the export process:
In the "File name" field, give a suitable name to the file to be created. The name you define will automatically have the .csv extension added to it.
Select the desired format in the "Export format" drop-down menu.
How can vibration data (background and/or events) be exported?
Data from a velocity or acceleration measuring point (vibration measurement module) can be exported as a file in CSV format for the period defined via SmartFilter.
Step by step:
First display the measuring point whose data you want to export.
Then select the "Export" command in the context menu.
In the export dialog that appears, make the desired settings and then click on "Export".
An archive file is then created, which contains a folder hierarchy according to export settings, and in which the exported data is stored as files.
The automatically formed name of this file contains, among other things, the date of the export. Further name components depend on the selected export settings. When using the standard setting, the name corresponds to this pattern: <Aktuelles Datum> Event_Xmr_Background_BmrPeakXyz.zip.
In the case of CSV export, the timestamps are exported in the format of the region of the current project.
How can data be exported via a programming interface?
The web-based programming interface can be used to query data such as projects, measuring points or vibration events.
How can measurement data be exported automatically?
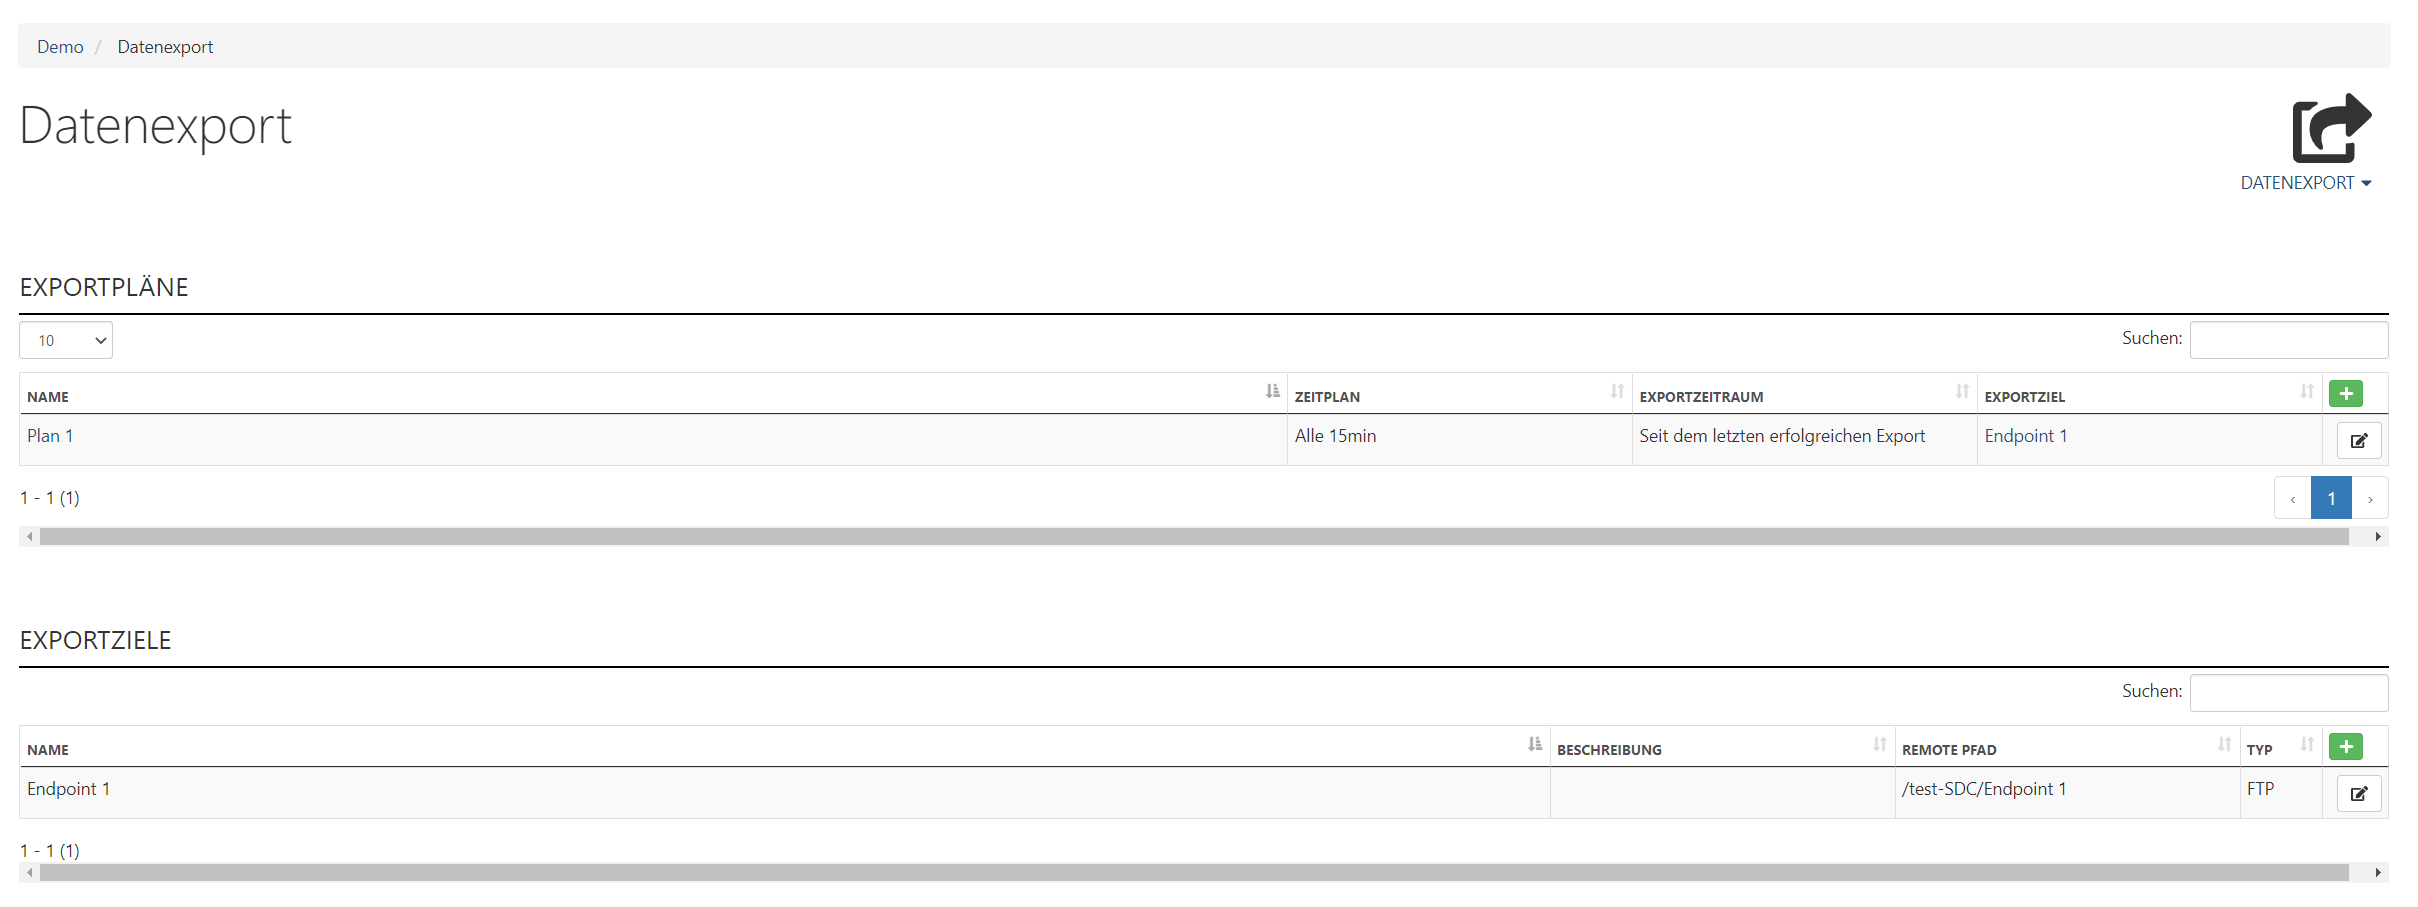
The data export within Sedrix offers you a variety of options to export data from your Sedrix system. You can start the data export manually at any time, or define when and in which form an automated data export should take place.
In the menu there is an entry to call up the data export (arrow icon).
In this menu, there is the option to create export plans and define the export destination.
Using Export Plans
Export plans allow data to be exported automatically at specified intervals or when a certain condition occurs.
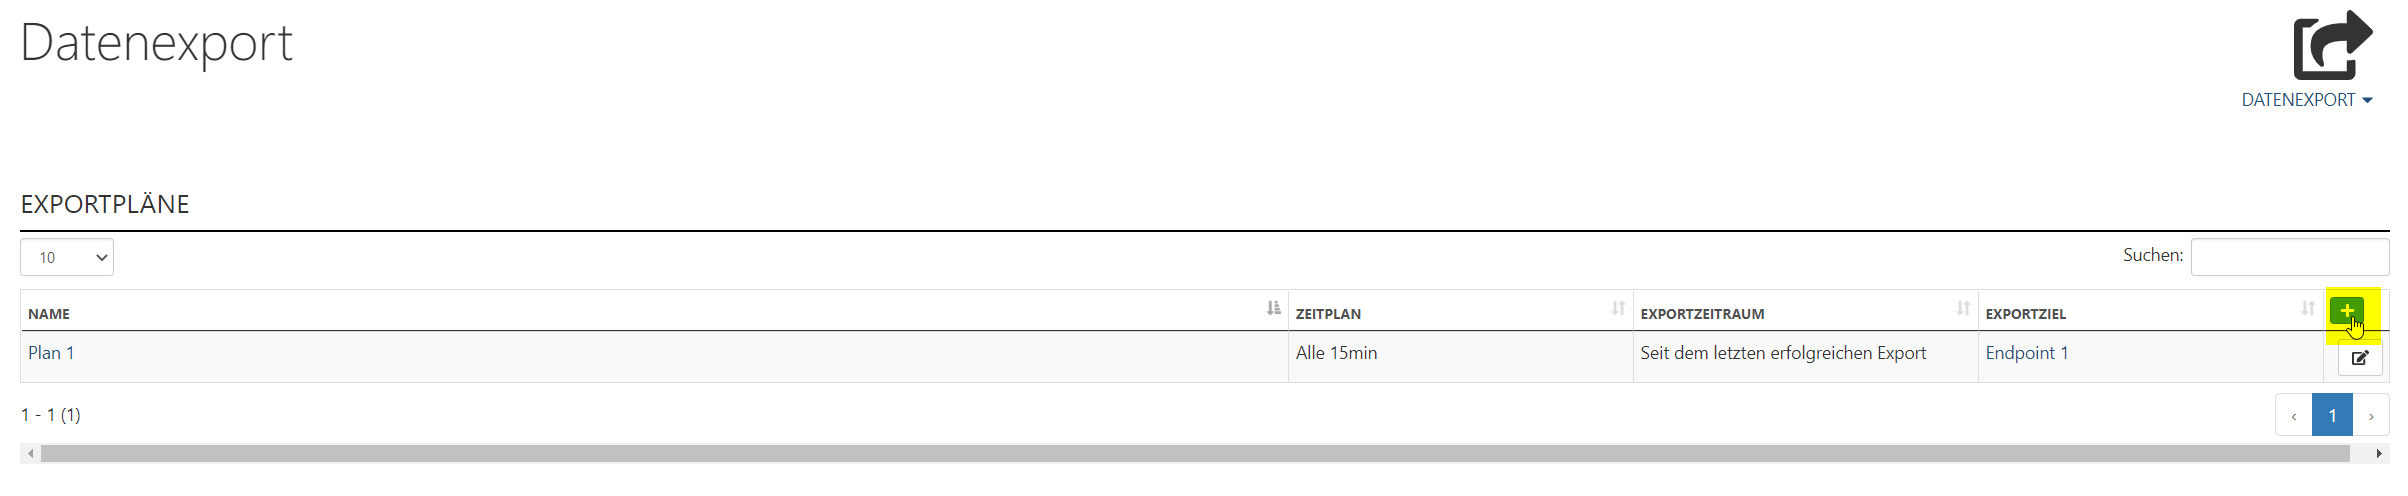
To create a new data plan, click on the plus icon (
) beneath the "Export plans" heading.
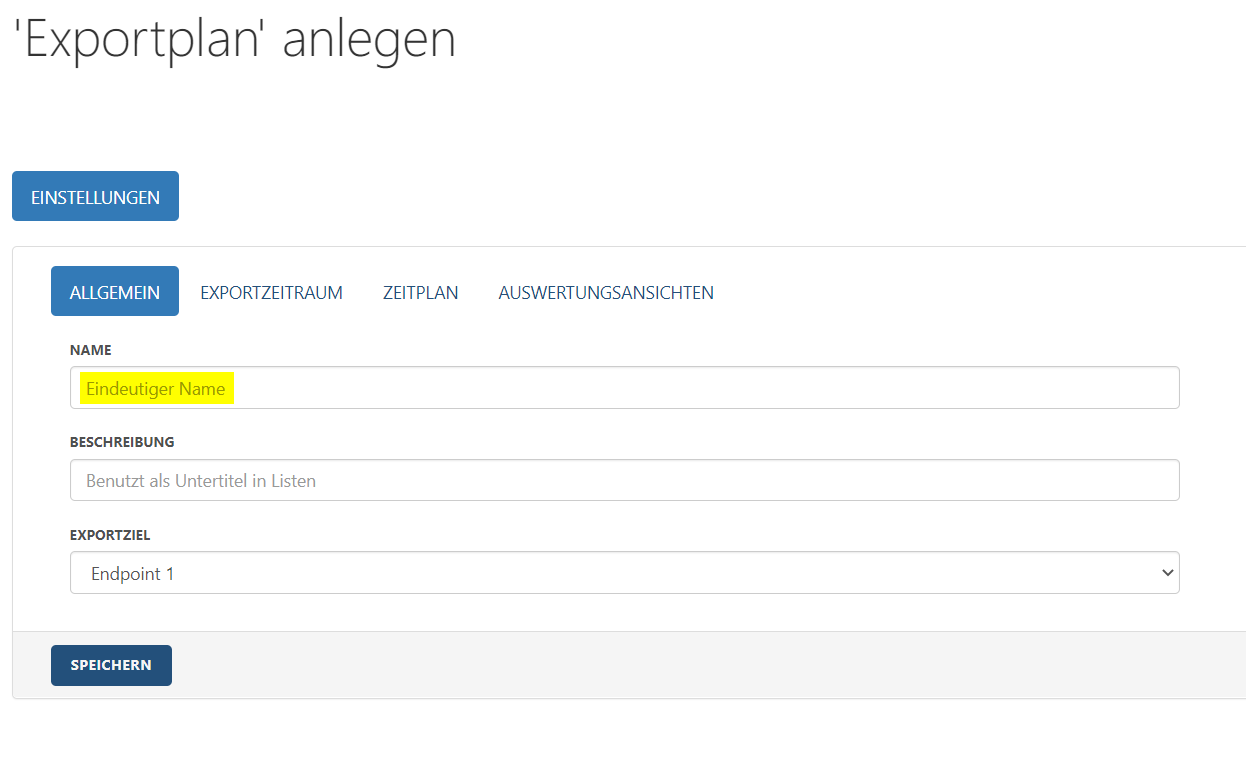
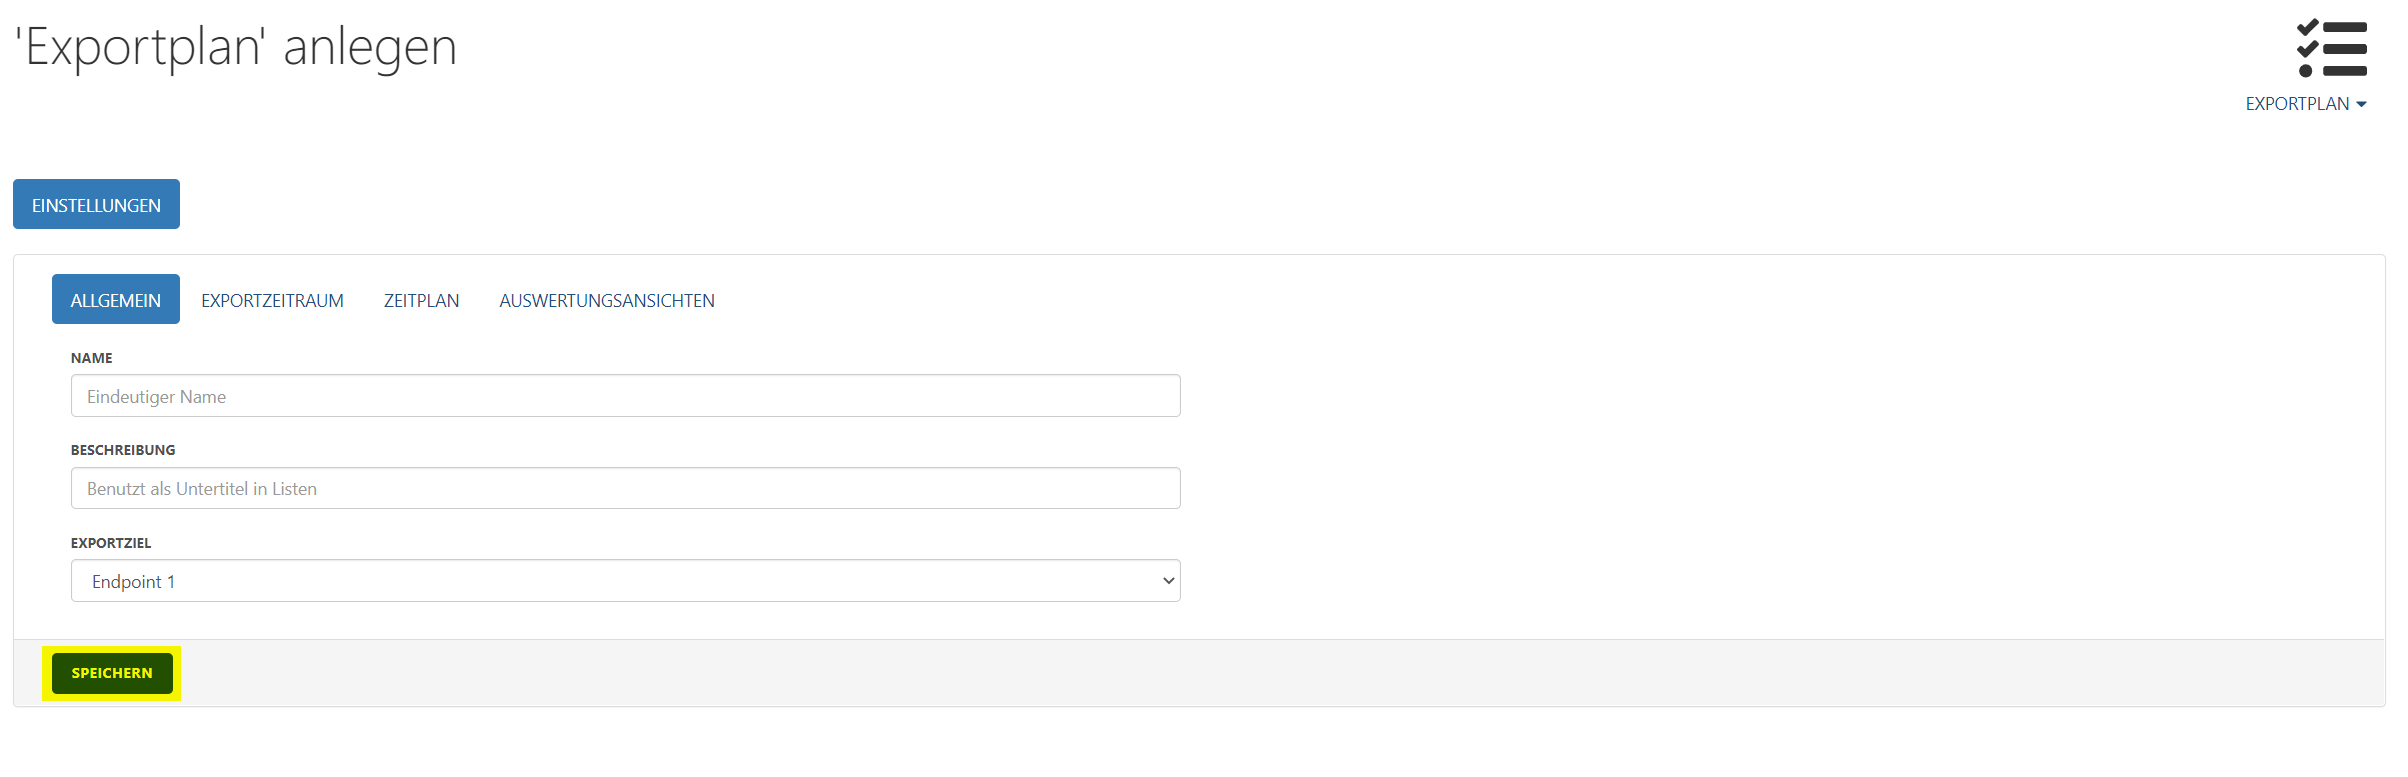
In the window that now opens, the various properties of the export plan can be configured.
General tab: general settings for the export plan
Name: A unique name for the plan should be entered here.
Description: You can choose to add a text here that is displayed in lists under the name, for example to better differentiate between different export plans.
Export destination: For this field, a created export destination can be selected from a list view, to which the exported data will then be sent. More about creating export destinations can be found in the following section.
Export time period tab: Specify the time period from which data will be included when performing the export.
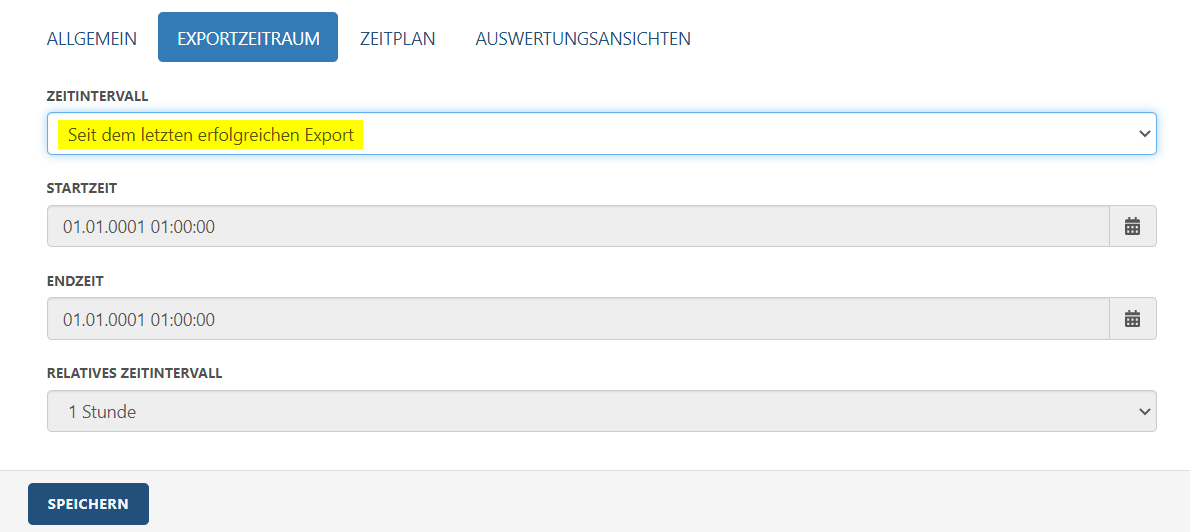
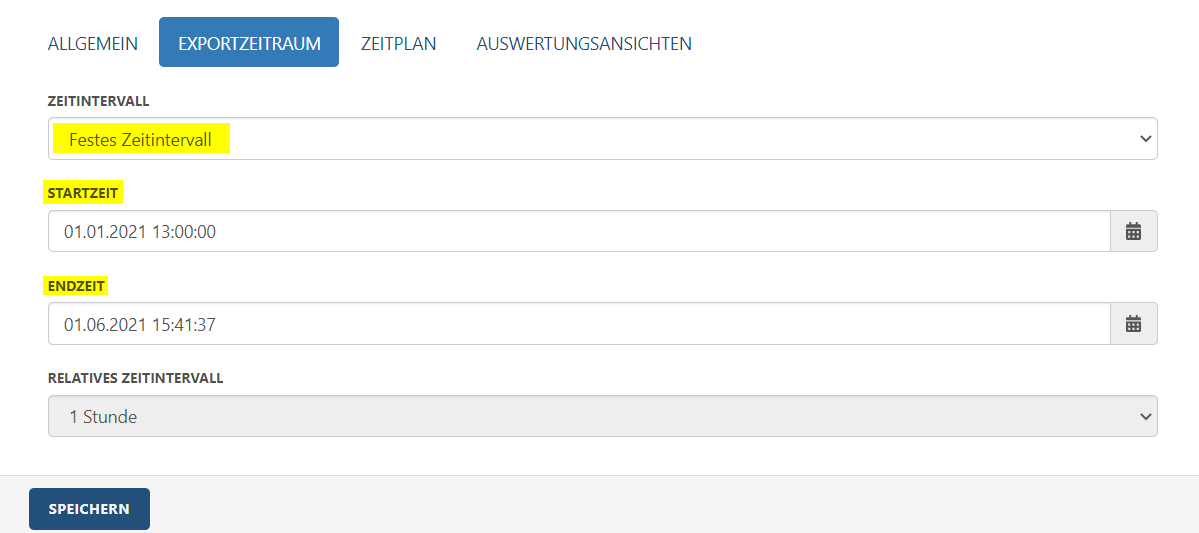
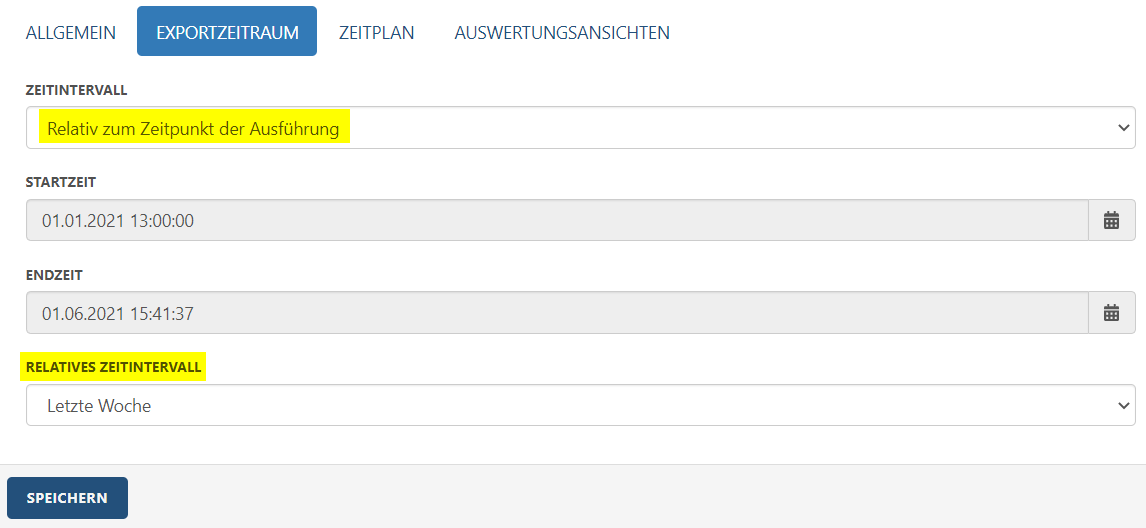
Time period: Three options can be selected here. Depending on the option selected, there are sometimes further setting options in the following fields (fields that are not required for the current option are grayed out).
Since last successful export: All data that has been generated since the last successful export will be exported.
Fixed time period: With this option, a date and a time can be entered in each of the Start time and End time fields or set by clicking on the calendar icon in a calendar view. All data generated between these times will be exported.
Relative to time point of execution: With this option, you can set the relative time interval (e.g. the last week, the last 30 days etc.). Depending on the time of the export then e.g. all data from the last week, the last 30 days etc. will be exported.
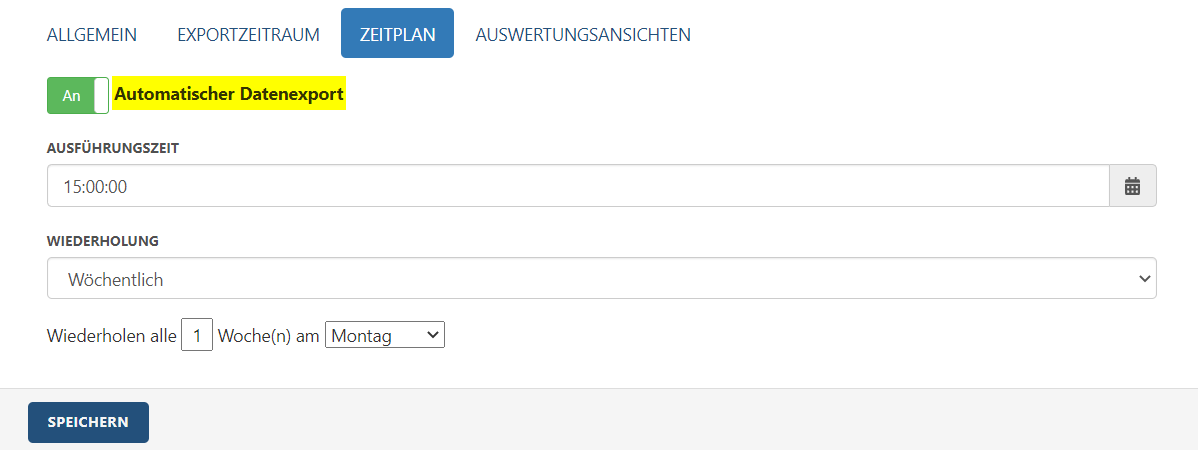
Time plan tab: Here you can automate the data export so that a data export is automatically carried out in set intervals.
Automatic data export: If the switch is set to "Off", no automatic export is carried out.
Execution time: Sets the time at which the data export is started.
Recurrence: Sets the time unit for the intervals between exports, i.e.
daily, weekly ormonthly: Here you can specify more detail in the line below, e.g. the day of the week for the export for weekly export, the day of the month for monthly export, etc.
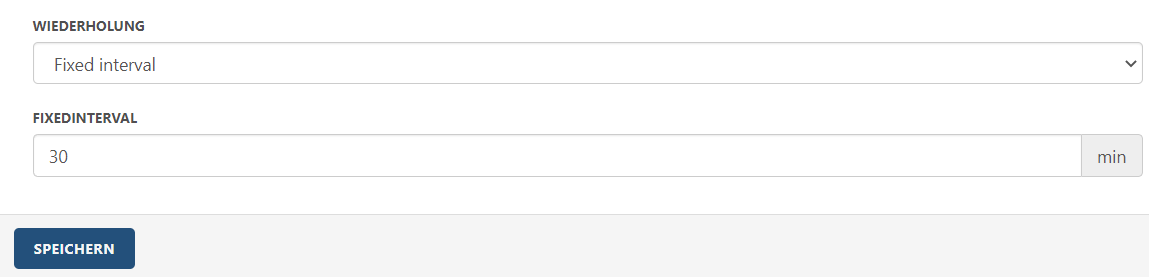
Fixed Interval: Here it is possible to specify in minutes when the exports will be performed, this is particularly suitable for more frequent exports, such as every 30 minutes. The number of minutes can also be set below the recurrence field (see picture on the right).
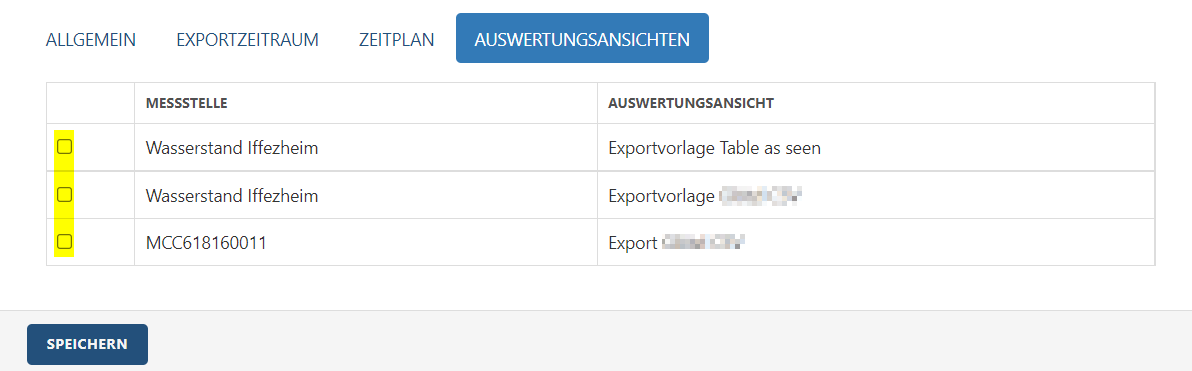
Evaluation view tab: In this tab you can define from which measuring point which data should be exported. This is done via evaluation views. All measuring points with evaluation views that are set for an export (see next section) are displayed here.
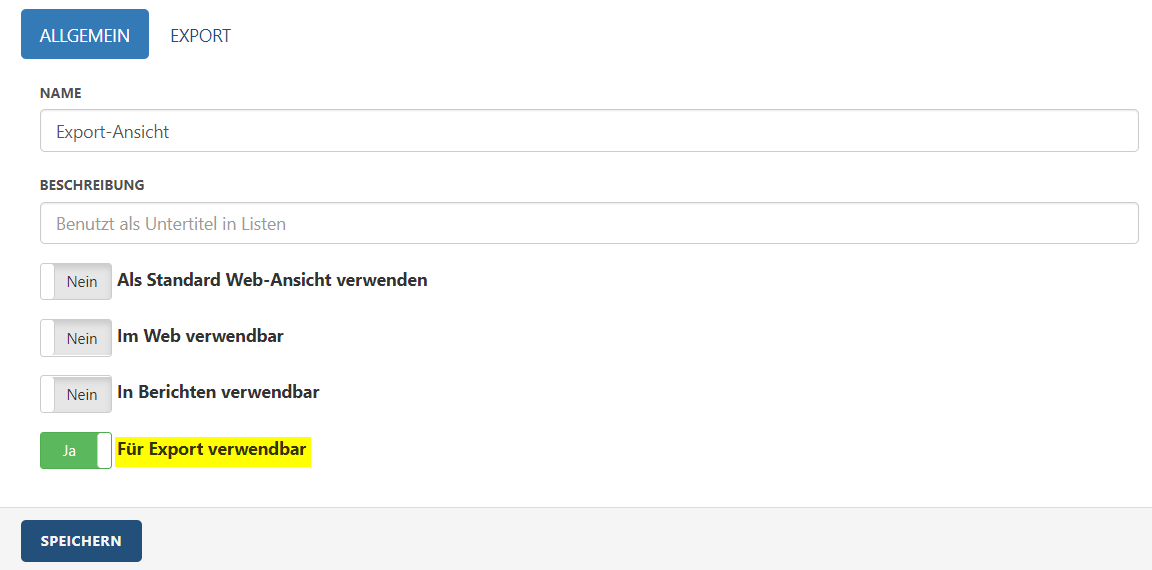
For the measuring point from which data is to be exported, an evaluation view must be created for which "Can be used for export" is activated in the settings. To set this and for further configuration see here.
When the settings for the export plan are made, the changes are applied by clicking "Save". This creates the plan and you can exit the view.
Click on the wrench icon (
) to re-open an existing export plan in order to modify the settings.
Using Export Destinations
The Export Destinations section allows you to configure the location to which the data is exported. If export plans control the "how" of an export, then export destinations are responsible for the "where".
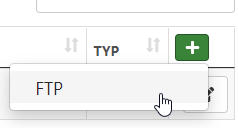
To create a new export destination, click on the plus icon (
) beneath the "Export Destinations" heading.
The type of export destination can be selected here. Currently there is only the option to use an FTP server as a destination.
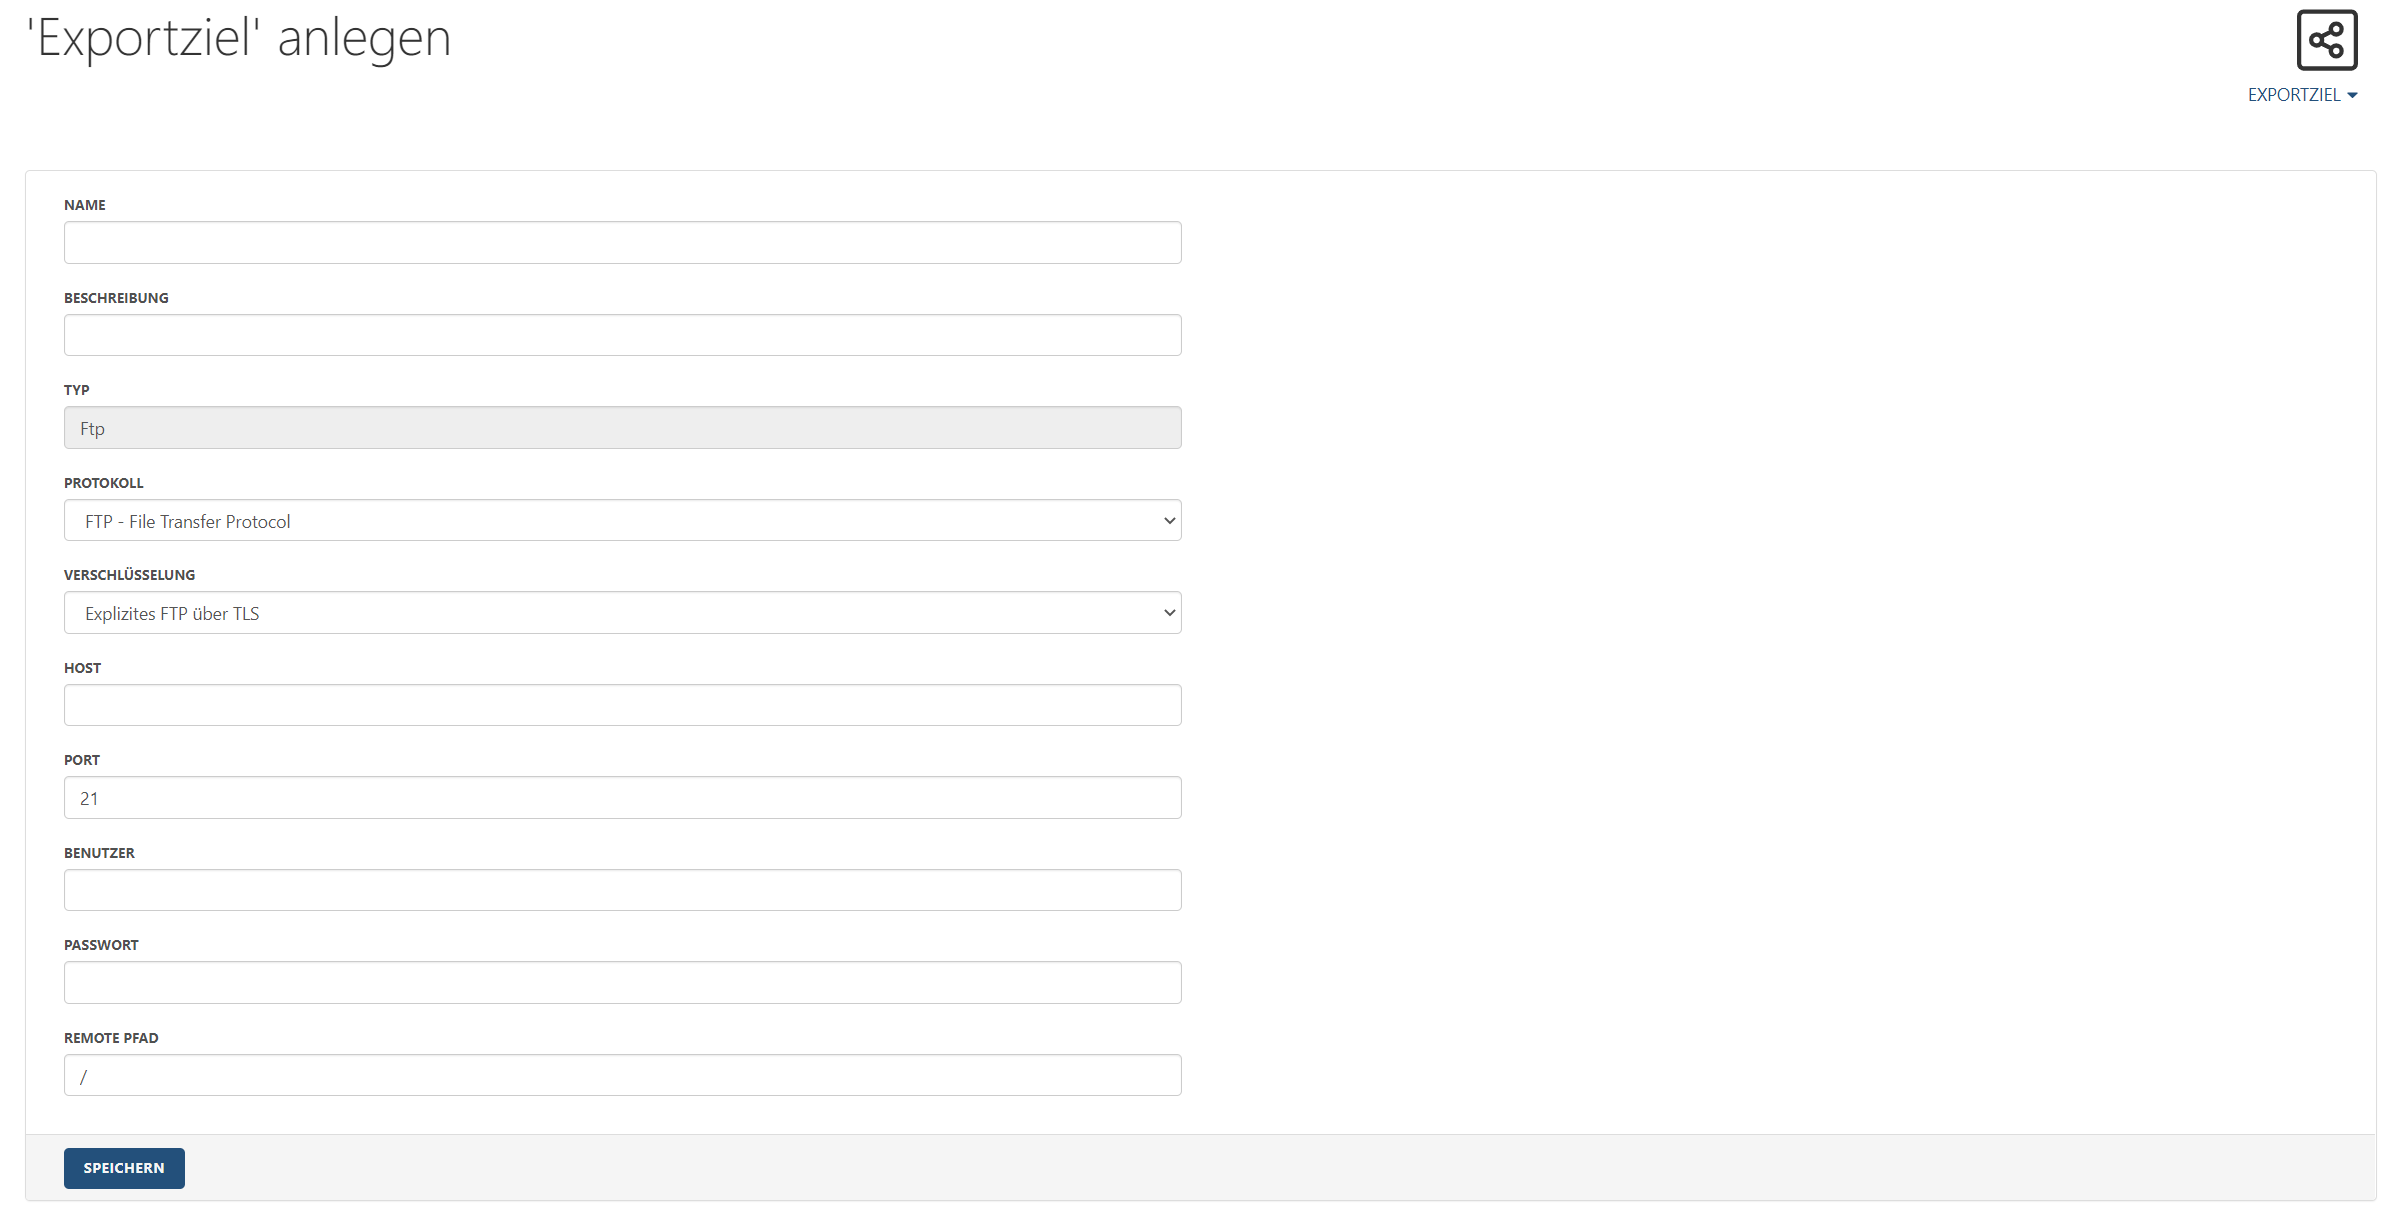
The configuration window now opens. All the required settings can be made here. The settings are explained in detail below.
Name: This field is mandatory. A unique name for the export destination must be entered here.
Description: A text can be optionally added here that will be displayed in lists under the name, for example to better differentiate between different export destinations.
Type: Currently only the FTP option is possible here (and therefore already entered).
Log: FTP is the only option at the moment.
Encryption: Here one of the three following options can be selected. The use of simple FTP is the most insecure option and should therefore only be used if explicitly required.
Explicit FTP over TLS
Implicit FTP over TLS
Use simple FTP only
Host: This field is mandatory. Enter the network address of the host server here.
Port: By default, port 21 is entered in this field. If another port is to be used, please enter it here.
User & Password: These fields are mandatory. Enter the credentials here that will be used to log in when exporting the data.
Remote Path: "/" entered by default. If desired, a destination directory to which the data export should take place can be entered here.
JavaScript errors detected
Please note, these errors can depend on your browser setup.
If this problem persists, please contact our support.