
Navigate to the data export area using the menu on the left.
In this view, all available export plans and export destinations are displayed and can be configured.
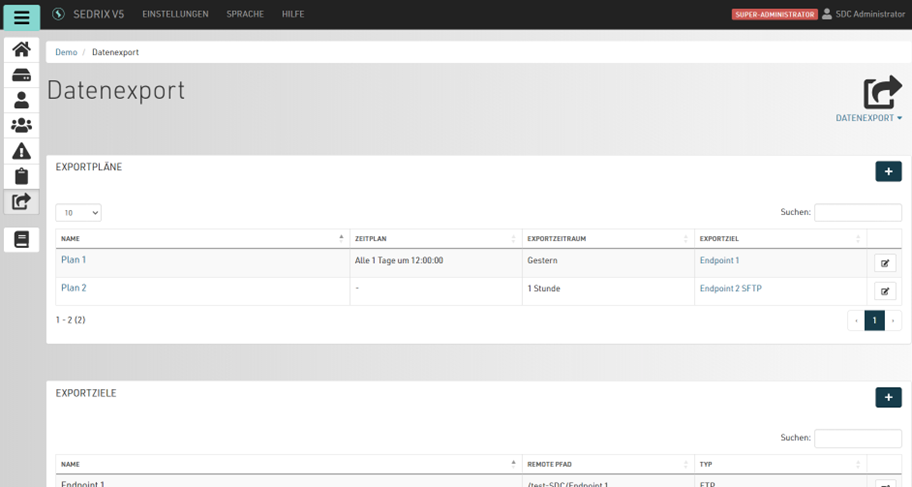
If there is no export destination yet, first create a new export destination to which the data should be uploaded.
Export destination
Now create a new export plan, for which you should select the correct export destination in the first step in the General tab.
Export time period
In the Export time period you can set the time period from which data should be exported. The following options are available:
|
From the last successful export |
The export period is set automatically based on the last successful export order. Select this option if you want to ensure continuous exports. |
|---|---|
|
Fixed time period |
A fixed time period is specified. This option should only be used as an exception or for test purposes. An automatic export that always uses the same export time period is not usually sensible. |
|
Relative to the time of execution |
The export period is determined relative to the execution period. This is useful, for example, if an export for the last calendar month is to be carried out every month. |
Schedule
In this tab you can set when and how often the export should be executed. Automatic execution can also be deactivated here.
Evaluation views
All evaluation views in the project that have been marked for use in an export are shown here. Select the evaluation views that should apply to the export plan.